REVIEW · TOKYO
Tokyo by Night Photography Tour (Private Option Available)
Book on Viator →Operated by MagicalTrip Inc. · Bookable on Viator
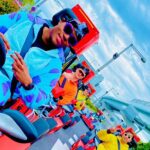
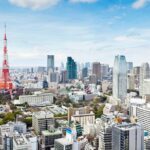
Neon Tokyo looks better after dark. This Tokyo by Night Photography Tour mixes street-level views with pro photo direction so you come home with edited shots you can actually use, including 20 photos. My only caution: it’s tightly photo-focused, and a few areas have strict rules about when you can shoot.
I like the small-group format (max 6). I also like that you’re not just sightseeing—you’re being photographed as you walk, with help on where to stand and how to time the light. The trade-off is simple: you’ll walk, and the exact route and stop length can shift with crowds and conditions.
In This Review
- Key Things That Make This Tour Work
- Starting From Miraion Lion Square in Shinjuku
- Shinjuku Golden Gai: Alley Lights, Tight Rules
- Kabukicho and Shinjuku’s Photo Stops: Walkable Variety
- Shibuya 109 and the Street Around It: Fashion Energy, Quick Captures
- Shibuya Crossing and Hachiko: The Icon Shots
- Tokyo Metropolitan Government Buildings Area: Neon + Big Landmarks
- How the Pro Photo Direction Works (and What It Means for You)
- What’s Included (and What’s Not) for a Clean Value Check
- Who This Tour Fits Best
- Should You Book This Tokyo Night Photography Tour?
- FAQ
- What time does the Tokyo by Night Photography Tour start?
- How long is the tour?
- What is the group size?
- Where is the meeting point?
- Is a camera required?
- How many edited photos will I receive?
- Is a drink included?
- Are there places where photography is not allowed?
- What if the weather is unsafe or the tour is canceled?
Key Things That Make This Tour Work

- Small group, max 6 people, so you’re not lost in a crowd
- 20 edited photos made from the images your guide captures during the tour
- Pro photographer direction, including posing cues so you get usable shots
- Neon-heavy stops like Shinjuku Golden Gai and Shibuya Crossing
- One included drink while you recharge mid-walk (some tours add a themed bar stop)
Starting From Miraion Lion Square in Shinjuku
The tour meets at Miraion Lion Square, in Shinjuku (3 Chome-38). It starts at 5:30 pm, which is a smart time because you catch the shift from daylight into full-on night lighting.
I like that the pace is planned around photos, not around hitting a checklist. That also explains why the duration is described as approximate (about 2 to 2.5 hours): if the streets are crowded or the light isn’t cooperating, the guide adjusts so you still get good results.
One practical thing: you need to be on time. If you’re late by more than about 15 minutes, you won’t join, and you won’t get a refund or a reschedule. So set a realistic arrival buffer—Shinjuku is huge, and night wandering is easier with a plan.
You can also read our reviews of more private tours in Tokyo

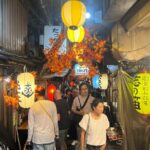
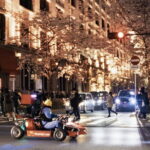
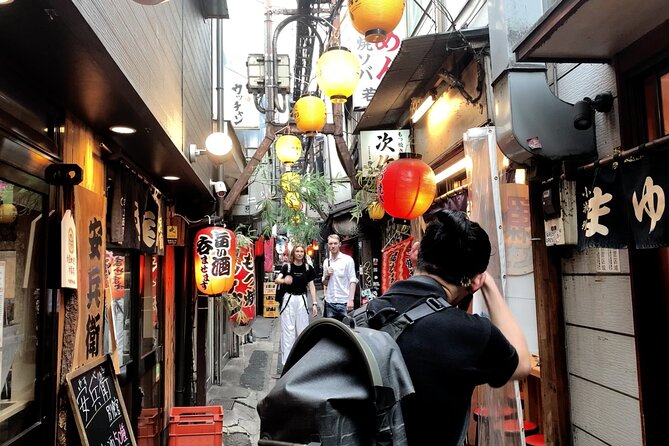
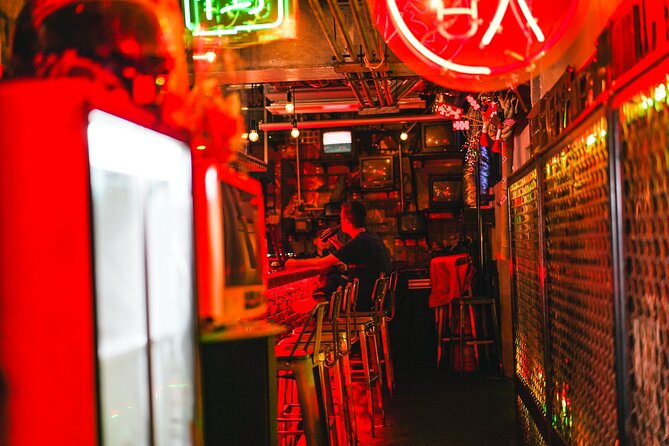
Shinjuku Golden Gai: Alley Lights, Tight Rules

Your first major stop is Shinjuku Golden Gai, known for its maze-like lane layout and bar clusters. This is the kind of place where you can get those Blade Runner-ish vibes—dark corners, tight streets, and neon bouncing off surfaces.
Here’s the careful part. Photography is strictly prohibited in some areas, including Shinjuku Golden Gai (and also Memory Lane). That means your experience may include more looking and positioning than constant shutter-clicking, even if you’re on a photo tour. In practice, your guide will tell you where you can stand and what you can capture.
Even with limits, Golden Gai is useful. It teaches you how to frame night scenes in narrow spaces—think reflections, signs, and faces lit by small pools of color rather than wide street views.
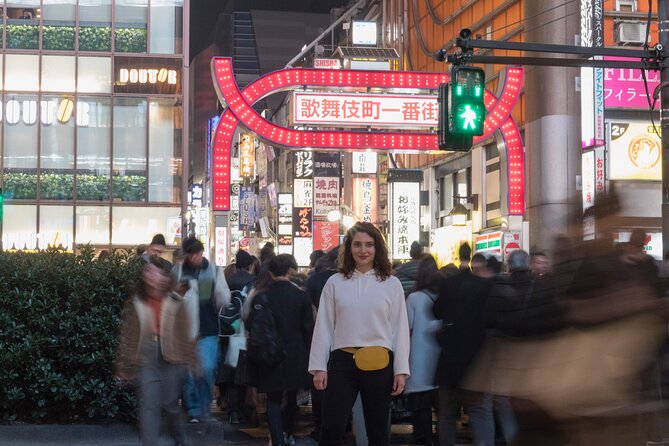
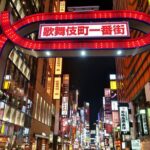
Kabukicho and Shinjuku’s Photo Stops: Walkable Variety
Next you’ll move through Kabukicho District, with time set aside for additional photo spots. This area has tons of surfaces that love night lighting: storefronts, signage, and the layered glow from nearby streets.
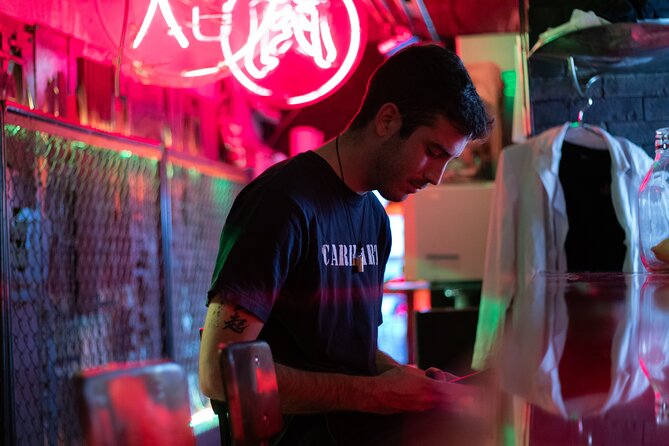
A good thing about this stop is variety. Instead of one “perfect angle,” you get multiple chances to try different compositions while the guide keeps the group moving. You’ll likely walk more than you expect for a 2.5-hour tour, so wear comfortable shoes—one review-sized tip that matches reality.
You also get an included drink. One described version of the experience includes a quick stop at a themed bar (even something steampunk-style) so you can pause, hydrate, and let your eyes reset before the bigger landmarks.
Shibuya 109 and the Street Around It: Fashion Energy, Quick Captures
After Shinjuku, the tour heads toward Shibuya, starting with a pass by Shibuya 109. This is one of those “you can feel the pace” locations, where the lighting and crowd density make night photography feel like a movie set.
Because you’re passing by rather than staying long, don’t expect deep sightseeing here. Expect quick photo opportunities and quick guidance—how to aim your camera, where the light falls, and how to keep your shot clean even when people are moving.
I like this kind of stop on a night tour because it keeps momentum. You’re learning the fundamentals of shooting at night—movement, reflections, and timing—without getting stuck in one spot too long.
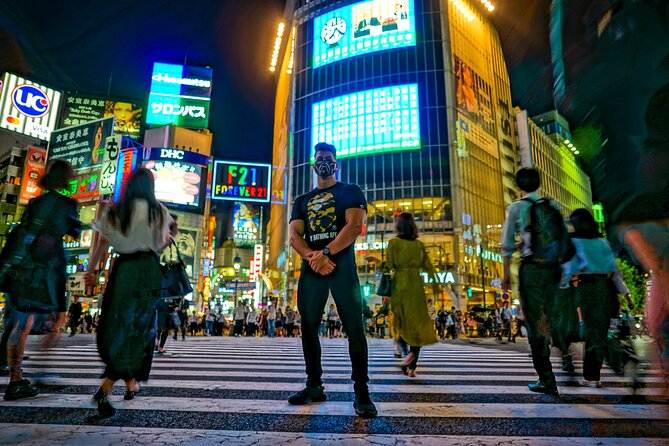
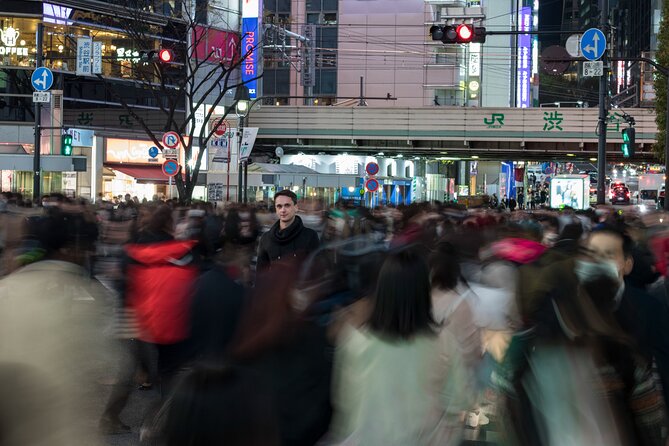
Shibuya Crossing and Hachiko: The Icon Shots
The core Shibuya moment is Shibuya Crossing, where you’ll take photos during a window of time. This is the obvious landmark, but it’s also where pro photo direction really matters. Without cues, it’s easy to end up with blurry faces or a wide shot where you look tiny under the crowd.
You’ll also pass Hachiko in Shibuya, which gives you another recognizable reference point. It’s a good contrast: Golden Gai teaches tight atmosphere, and Hachiko teaches you how to frame a famous meeting place without turning your photo into a traffic jam.
You’ll likely also go past Shibuya Center gai, another area with shops and crowds that stay lively into late evening. The goal here isn’t “shopping time.” It’s learning how to work with messy backgrounds—bright signs, overhead lights, and people flowing in different directions.
You can also read our reviews of more evening experiences in Tokyo


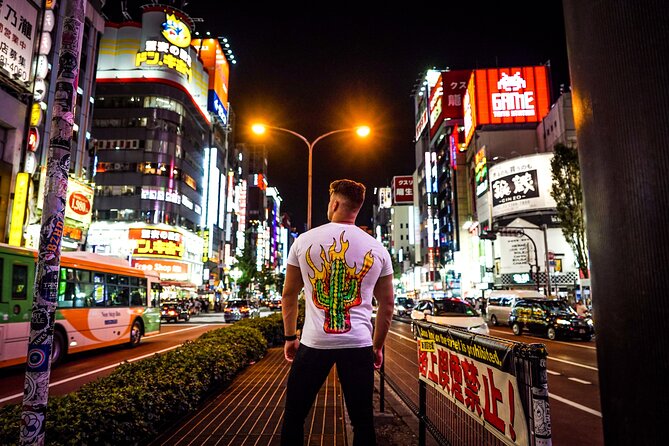
Tokyo Metropolitan Government Buildings Area: Neon + Big Landmarks
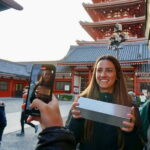
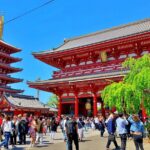
Toward the end, you’ll return to the Tokyo Metropolitan Government Buildings area for more street-level photo time. The tour’s description also points to the nearby observation deck on the 45th floor, but what matters for you on this walking tour is the street view and the way the area frames the skyline lights.
This is one of the most useful parts of the itinerary because you get a mix of:
- a temple area stop-by photo moment,
- a pedestrian bridge for lines and perspective,
- a Love Sculpture reference,
- plus the buildings and major signage nearby, including Yodobashi Camera.
If you’re aiming for that cyber-noir look, this is where it starts coming together. You get clearer “structures” for your compositions, not just close-up neon.
One more reason I like ending here: night shooting often benefits from a bit of repetition. By the time you reach these landmark zones, you’ve already practiced timing and positioning during earlier stops, so your shots tend to improve quickly.
How the Pro Photo Direction Works (and What It Means for You)
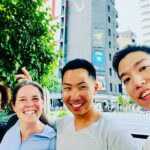
The biggest reason this tour is worth considering is simple: you’re not only walking through Tokyo—you’re being photographed along the way by an English-speaking professional.
You’ll receive 20 edited images, meaning you don’t have to learn night editing from scratch before you leave Japan. And from the way guides and photographers are praised in similar experiences, you can expect that your guide is managing more than just taking photos. They’re also helping you:
- find the best spots on the sidewalk,
- pose in ways that work with low light,
- and keep you moving so you don’t miss the best lighting windows.
What should you do to get better results? Two practical tips based on the experience style:
- Keep your hands free. One repeated suggestion is to bring fewer bags since you’ll be setting them down at photo stops.
- Don’t fight the pace. The walk can be fast, and you’ll do better if you stay close and listen for the next cue.
Also, you do not need a camera to enjoy the tour. If you want to shoot your own photos, bring one—but remember that some places have strict photography prohibitions, so your guide’s instructions will matter more than your camera instincts.
What’s Included (and What’s Not) for a Clean Value Check
The tour is $105.71 per person for about 2 to 2.5 hours. For night photography, that price is usually “fair” only if you’re getting real deliverables. Here, the deliverable is clear: 20 edited photos plus a guided route and a professional photographer photographing you during the walk.
You also get:
- exploring with a local guide / English-speaking photographer,
- 1 drink during the tour,
- and certification through MagicalTrip (as the listed provider).
What you do not get:
- dinner (you’ll need to plan a meal afterward),
- train transportation fees (you’ll pay your own subway or train costs),
- any extra paid activities at stops beyond what’s stated.
So the value math is: you’re paying for time, guidance, and editing. If you like night photos but don’t want the hassle of learning settings, finding angles, and editing later, this is a practical way to buy results.
Who This Tour Fits Best
This tour is a strong match if you want:
- iconic Tokyo night scenes without planning every stop yourself,
- photos with you in them (not just Tokyo behind you),
- and a walk you can handle with comfortable shoes.
It’s also great for solo travelers. Being photographed by a guide solves the classic solo problem: you either ask strangers to take your photo or you spend time setting up shots. Here, you get directed poses and shots in more realistic time windows.
It may be less ideal if you hate walking fast or if you want long, slow sightseeing with downtime. Because it’s photo-focused, the stops are designed for shots and movement, not lingering conversations.
Weather matters too. Japan’s temperatures can swing hard, so dress for extremes—winter can get down near -5°C, and summer can reach about 40°C. Bring a light layer for the evenings, and don’t underestimate how cold or hot it can feel while standing around for angles.
Should You Book This Tokyo Night Photography Tour?
If you want a photo-first Tokyo experience—Shinjuku alleys, Shibuya landmarks, and a real set of edited images—this is an easy yes. The small group size (max 6) and the included 20 edited photos are the two biggest reasons it feels like more than a casual stroll.
I’d especially recommend it if you:
- want Shibuya Crossing and Shinjuku Golden Gai vibes without guessing where to stand,
- like the idea of receiving photos from a pro instead of relying only on your own shots,
- and can commit to being on time at the meeting point.
Skip it or approach with eyes open if you:
- need lots of time at each stop for sightseeing,
- plan to shoot constantly yourself in every location (because some areas restrict photography),
- or don’t like fast-paced walking.
FAQ
What time does the Tokyo by Night Photography Tour start?
The start time is 5:30 pm.
How long is the tour?
It’s approximately 2 hours 30 minutes, and the exact duration can vary within about 2 to 2.5 hours depending on conditions and the day’s photo setup.
What is the group size?
The tour has a maximum of 6 travelers.
Where is the meeting point?
The meeting point is Miraion Lion Square, 3 Chome-38 Shinjuku, Shinjuku City, Tokyo 160-0022, Japan.
Is a camera required?
No camera is required unless you want to take picturesque photos of your own. The professional photographer will be shooting you.
How many edited photos will I receive?
You receive 20 edited photos during or from the tour.
Is a drink included?
Yes, 1 drink is included.
Are there places where photography is not allowed?
Yes. Photography is strictly prohibited in some areas, including Shinjuku Golden Gai and Memory Lane.
What if the weather is unsafe or the tour is canceled?
The tour might be canceled in unsuitable weather for safety reasons.