REVIEW · TOKYO
Tokyo: Japanese Calligraphy Lesson with Skilled Instructor
Book on GetYourGuide →Operated by Experience Calligraphy Tokyo · Bookable on GetYourGuide
A quiet hour in Asakusa can steady your hand. In a small-group lesson with Shusuke, you get English explanations for meaningful Japanese words, then leave with a finished calligraphy souvenir. The main trade-off is time: it’s a one-hour class, so you’ll focus on one word or phrase rather than doing lots of different characters.
What makes this work is the calm, hands-on coaching. You practice on calligraphy paper, get direct tips while your strokes are still fresh, and then transfer your best version onto the souvenir item you choose. If you want a relaxing activity that still feels genuinely Japanese, this hits the sweet spot.
In This Review
- Key Highlights I’d Bookmark
- The Asakusa Room Setup: Tatami Calm or Desk-Chair Focus
- Meeting Shusuke: Certified Craft, Relaxed Teaching
- Choosing Your Word or Phrase: Meaning First, Then the Brush
- Practice on Hanshi: 20 Sheets and Real Stroke Control
- Turning Your Writing into a Souvenir: Uchiwa, Shikishi, or Kakemono
- The Photo Moment: Capture It Before You Pack It Away
- Price and Time Value: What $45 Buys in One Hour
- Who Should Book This Tokyo Calligraphy Lesson
- Should You Book This Calligraphy Workshop in Asakusa?
- FAQ
- How long is the Japanese calligraphy lesson?
- What souvenir will I make in the class?
- What’s included with the lesson?
- How small is the group, and what languages are offered?
- Where do we meet in Asakusa?
- Can I cancel, and do I have to pay right away?
Key Highlights I’d Bookmark
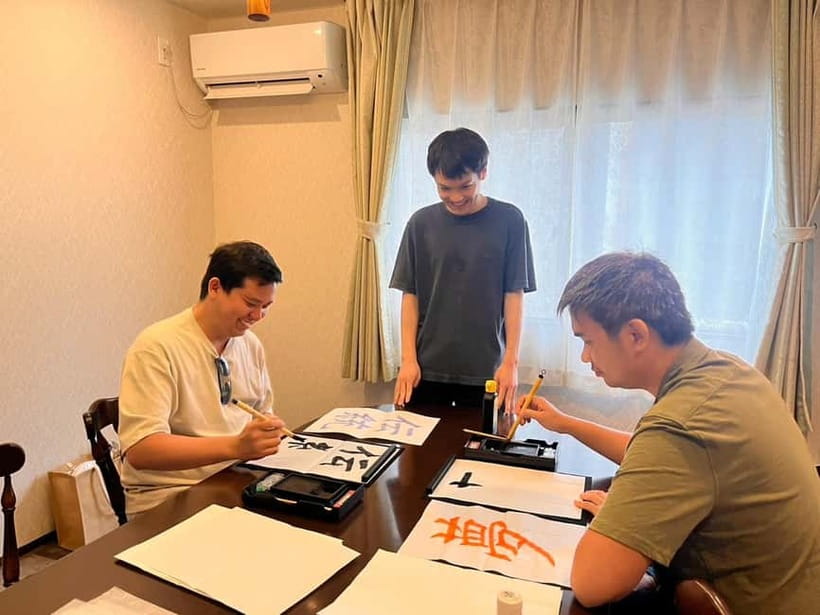
- One instructor, max 4 people: a setup that keeps attention on you, not on a crowd.
- Shusuke’s English support: you can understand meanings clearly even if your Japanese is beginner-level.
- 20 sheets of hanshi: enough practice time to fix mistakes while they’re small.
- Pick your souvenir format: uchiwa fan, shikishi board, or kakemono hanging scroll.
- Commemorative photo: you’ll capture your finished work before you head back out.
The Asakusa Room Setup: Tatami Calm or Desk-Chair Focus
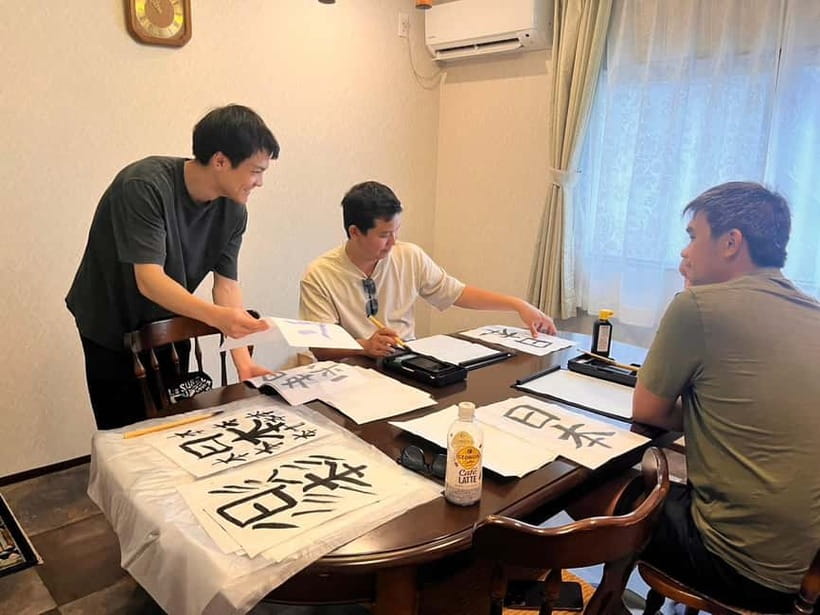
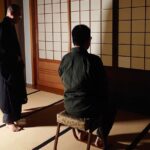
This lesson happens in a rental room in Asakusa, and the exact room style depends on availability. You might be seated on traditional tatami, or you might work at a table with chairs in a more Western-style layout. Either way, the goal is the same: a quiet space where you can concentrate on strokes without the usual tourist distractions.
What I like about this kind of setup is that calligraphy isn’t a watch-and-clap activity. You need room for your paper, space for your hand movement, and enough light to see the thickness of your brush marks. A dedicated room makes that easy, especially since the class is limited to 4 participants.
One practical consideration: the experience is only 1 hour, so you’ll want to show up ready to start. If you arrive late or distracted, it can cut into the part where you get the most practice time.
You can also read our reviews of more tours and experiences in Tokyo



Meeting Shusuke: Certified Craft, Relaxed Teaching
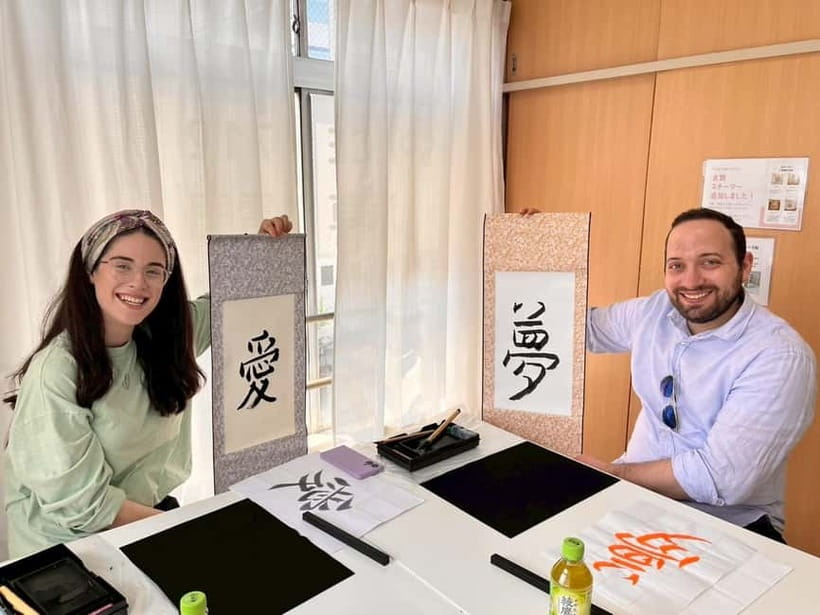
Your instructor here is Shusuke, and he brings serious credentials without turning the class into a lecture. He’s certified in Japanese calligraphy as a 3rd Dan through the Japan Educational Calligraphy Federation, and he has over 10 years of experience teaching calligraphy. That matters because good instruction is less about talent and more about correcting the small things early.
Shusuke also speaks Japanese and advanced English, plus beginner Korean. In practical terms, this means you’re not stuck guessing what the words mean or what the teacher is telling you to fix. If something feels confusing, you can usually get it explained in clear English while he demonstrates proper stroke control.
From the vibe in how people describe their time with him, you’ll likely notice the same pattern: calm guidance and lots of photo-taking. Getting your work photographed sounds minor, but it’s a nice way to remember what your final strokes looked like, not just what you hoped they looked like.
Choosing Your Word or Phrase: Meaning First, Then the Brush
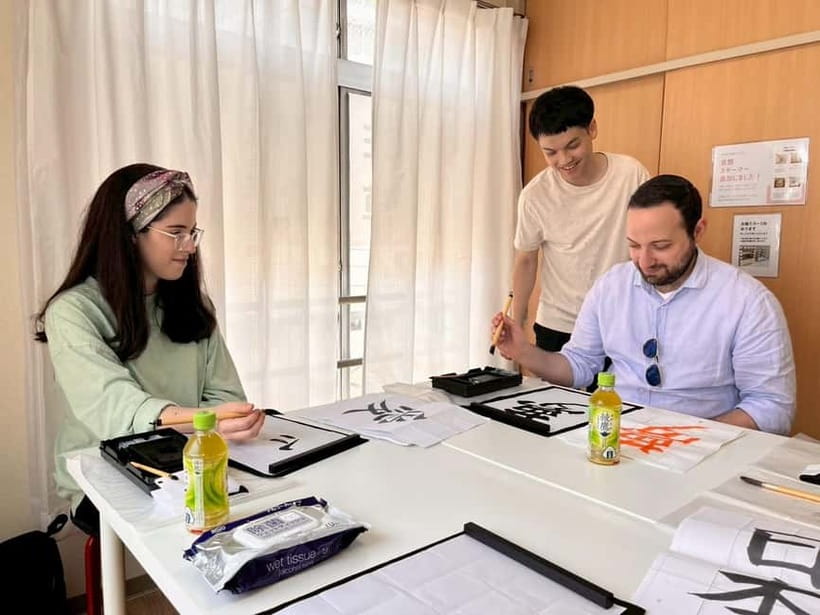
The class starts with you choosing a favorite word or phrase. Instead of handing you random characters, the instructor presents sample calligraphy works, each with its own meaning and cultural significance. Shusuke explains those meanings in English, so you can pick something that actually fits you, not just something that looks pretty on paper.
This is where you’ll do the most thinking. Do you want a word connected to calm, gratitude, determination, or something personal to your trip? When you understand the meaning, your brushwork tends to feel more intentional. You’re not just copying shapes; you’re writing something you chose.
A small warning that isn’t really a downside, just reality: you’ll focus on one choice during the session. That’s how you get quality, not chaos. If you want to experiment with many different characters, this one-hour format won’t be your longest workshop, but it can still give you a satisfying result you’ll be happy to keep.
Practice on Hanshi: 20 Sheets and Real Stroke Control
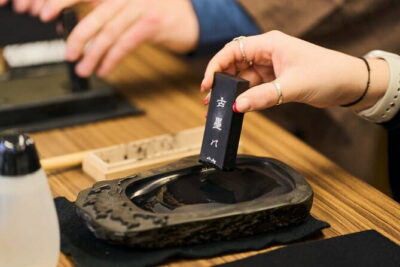
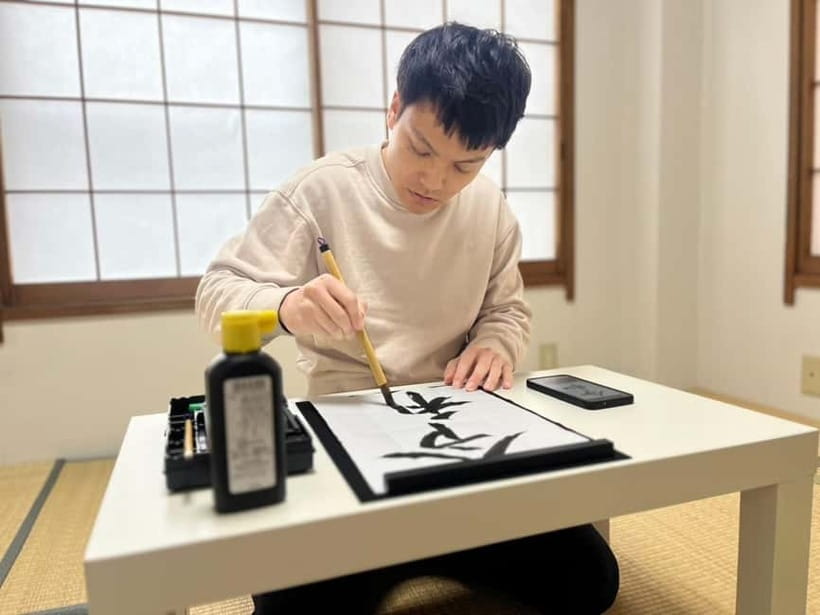
Once you choose, it’s practice time using hanshi (Japanese calligraphy paper). You receive 20 sheets, which gives you more than enough room to adjust your grip and stroke angle without feeling like each attempt costs you dearly.
You’ll typically get around 30 minutes of practice with guidance and tips. That guidance is the key. Calligraphy often looks simple until you try it and realize ink behaves like ink, not like a pen. Brush pressure changes line thickness. Speed changes the flow. Even small wrist and finger shifts change the character’s balance.
Here’s the value of having an experienced instructor in the room: you don’t just need encouragement. You need corrections at the moment they matter. Shusuke’s job is to help you refine strokes while your practice is still close enough that you can fix the issue immediately.
Another practical benefit: having 20 sheets means you can go through a small cycle of try, compare, and improve. You’ll likely feel the difference between your first attempt and your better attempt, and that progress is part of the fun.
Turning Your Writing into a Souvenir: Uchiwa, Shikishi, or Kakemono
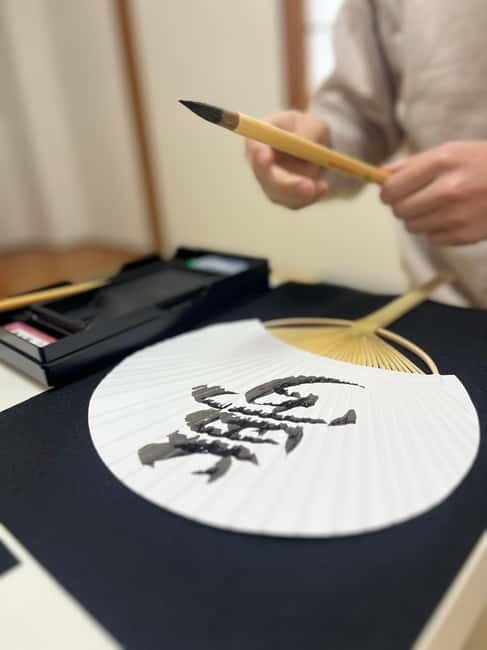
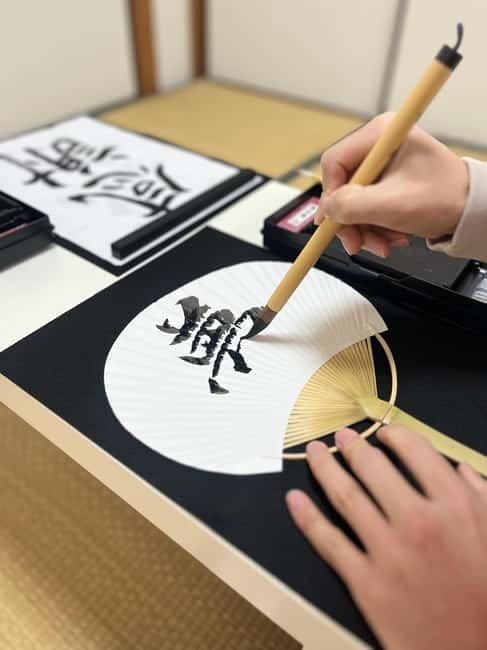
After you refine your chosen calligraphy, you transfer it onto your final souvenir. You get to choose one of three classic formats:
1) Uchiwa (fan)
This is a traditional Japanese folding-style fan (often used as a summer accessory). Your character sits on a handheld object, which makes it practical as well as decorative. It’s also a good pick if you want something that feels personal and interactive.
2) Shikishi (decorative board)
A shikishi is a flat board designed specifically for calligraphy display. It’s a clean look, usually with a more formal, gallery-style feel. If you like the idea of something that can sit on a desk or be framed later, this option tends to be popular.
3) Kakemono (hanging scroll)
A kakemono is made to hang. It gives your calligraphy a sense of occasion, like it belongs in a room rather than just a drawer. If you’re the type who likes creating a visible reminder of your trip, this is often the most dramatic choice.
What you’ll appreciate here is that your souvenir isn’t random. It’s built directly from your selected word and your practice progress. And because the class is small, the instructor can keep an eye on your transfer so your final piece looks like it belongs together, not like it was rushed at the end.
One consideration: your final result depends on the single word or phrase you choose and how much you refine during practice. If you want a “perfect” look, focus on consistency in your lines during the practice stage, not only on copying the last version.






The Photo Moment: Capture It Before You Pack It Away
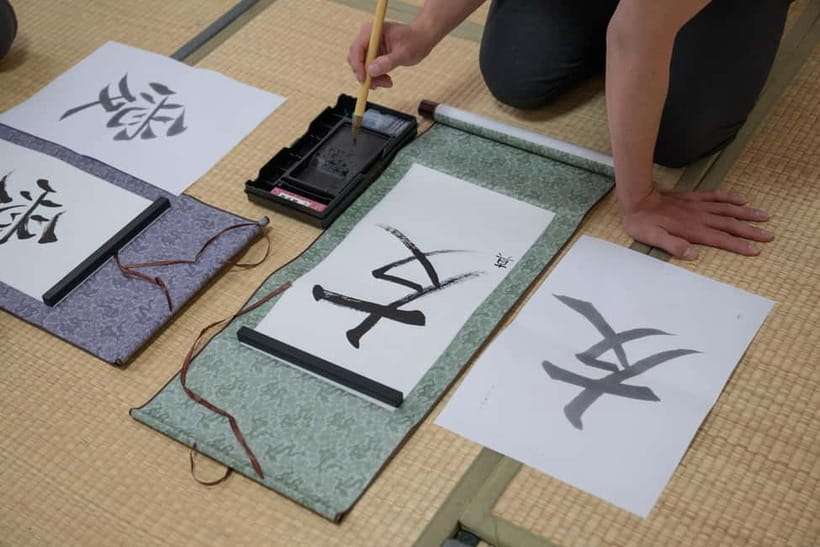
At the end, you celebrate your completed calligraphy with a commemorative photo. It’s a simple touch, but it solves a common travel problem: you finish something you’re proud of, then later you realize you didn’t document it well.
You’ll also walk away with your actual finished souvenir, so the photo becomes more than a memory—it helps you remember what you made when it’s already packed and out of sight. If you’ve ever bought something small in Japan and later wished you could recall what it looked like right after it was created, you’ll understand why this matters.
From how people describe Shusuke’s teaching, he also tends to take plenty of photos. So you’re not stuck with one blurry shot and a guess.
Price and Time Value: What $45 Buys in One Hour
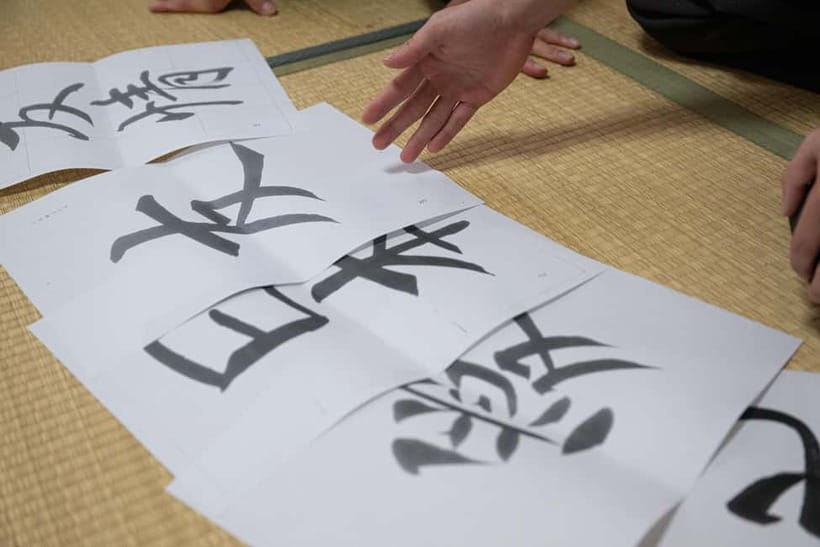
At $45 per person for 1 hour, this is priced like a hands-on workshop, not a quick demo. The value comes from several concrete things you can’t fake: instruction from Shusuke (10+ years teaching), guided practice on 20 sheets of hanshi, and a final souvenir in one of three real formats.
This is important: you aren’t paying for someone to show you calligraphy from across a room. You’re paying for a structure that includes practice time plus a finished output you’ll actually take home. For many people, that’s the whole point of paying for an experience in Tokyo—you want the learning to result in something tangible.
The time is also part of the value. One hour sounds short until you remember the class is tightly focused: choose a word, practice your strokes, transfer to a souvenir, and wrap up with a photo. That compact schedule fits well if you’re juggling sightseeing, jet lag, or just want a calm indoor break.
Who Should Book This Tokyo Calligraphy Lesson
This lesson is a great fit if you want something calm, creative, and easy to understand. It also works well for true beginners because you can rely on English explanations of word meanings and step-by-step coaching during practice.
You’ll likely enjoy it if you:
- want a souvenir that comes from your own hands, not just shopping
- like learning something small but meaningful during a short trip
- appreciate guided instruction rather than solo creative time
You might not love it as much if you:
- want to learn multiple different characters in one session (this format focuses on one word or phrase)
- need longer coaching time to get fully comfortable with brush techniques
Also, because the group is limited to 4 participants, it’s naturally better for people who prefer an intimate class. If you enjoy being able to ask questions without waiting for a crowd, this small size is a big deal.
Should You Book This Calligraphy Workshop in Asakusa?
I’d book it if you want a low-stress way to make a real Japanese souvenir and understand what you’re writing, not just how it looks. The combination of Shusuke’s credentials, the English explanations for meanings, and the hands-on practice time on 20 sheets makes the experience feel fair for the price.
Pick your souvenir based on how you want to live with it afterward: a fan for something practical and light, shikishi for a clean display piece, or a kakemono if you want your calligraphy to feel like it belongs on a wall. Then treat the practice time as the main event. If you get the strokes right during that stage, the final transfer will feel much less stressful.
If your schedule is tight and you want one hour of calm with an authentic craft, this is a strong choice.
FAQ
How long is the Japanese calligraphy lesson?
It lasts 1 hour.
What souvenir will I make in the class?
You can make your calligraphy on one of these: uchiwa (fan), shikishi (decorative board), or kakemono (hanging scroll). You choose the option during the lesson.
What’s included with the lesson?
The class includes access to word samples with meanings explained in English, step-by-step guidance from the instructor, 20 sheets of hanshi, and a commemorative photo with your completed piece.
How small is the group, and what languages are offered?
The group is limited to 4 participants, and the lesson is available in English and Japanese.
Where do we meet in Asakusa?
You meet in one of the rental rooms in Asakusa. The specific location and meeting point are shared by email after you reserve, and the room style may be a tatami room or a Western-style room with a table and chairs depending on availability.
Can I cancel, and do I have to pay right away?
You can cancel up to 24 hours in advance for a full refund. You can also reserve now and pay later, meaning you can book your spot and pay nothing today.