REVIEW · TOKYO
Tokyo Cyberpunk Street Photo Tour
Book on Viator →Operated by EYExplore Tokyo · Bookable on Viator
Tokyo at night turns your camera into a time machine. This cyberpunk street photo tour guides you through neon-heavy Shinjuku and ends at Shibuya Crossing. I especially like the small group size (max 4) and the fact the instructor works with both serious cameras and phones. One thing to consider: you’ll be walking at a real pace through busy nightlife areas, so bring comfy shoes and expect to keep up.
I like how the tour is built around practice, not just sightseeing. You get photo instruction along the way, then stop at high-impact spots where you can immediately test settings and composition under changing light. The possible drawback is that some people find the route fast and the timing tight if you pause too long to reset your gear.
If you want an efficient way to get night shots in Tokyo without spending hours figuring out where to stand, this is a strong plan. You’ll leave with images designed for sharing, plus a better feel for how to control light, crowds, and motion in low-light conditions.
In This Review
- Quick hits before you go
- Neon street practice in Shinjuku and Shibuya
- The 3-hour flow and why the timing works
- Getting started at Happy Lemon Keio Shinjuku (7:00 pm)
- Stop 1: Kabukicho District (about 1 hour of neon)
- Stop 2: Omoide Yokocho Memory Lane (about 30 minutes)
- Stop 3: Shibuya Crossing (about 45 minutes of motion)
- How the instructor teaches camera settings and phone tricks
- Gear advice for cyberpunk night shots (camera or phone)
- Price and value for $184.99 per group (up to 2)
- What to watch for: pace, crowds, and where you might fall behind
- Should you book the Tokyo Cyberpunk Street Photo Tour?
- FAQ
- FAQ
- How long is the Tokyo Cyberpunk Street Photo Tour?
- How many people are in the group?
- Where does the tour start and end?
- What areas do you photograph during the tour?
- Do I need a camera, or can I use a smartphone?
- Is transportation included?
- What happens if the weather is bad?
Quick hits before you go
- Small group (up to 4) means the instructor can actually adjust to your level.
- Shinjuku + Shibuya after dark gives you neon density plus the iconic crossing finale.
- Long-exposure street practice helps you turn headlights, signs, and moving people into art.
- Phone-friendly guidance covers practical tricks for people shooting on iPhone/Android.
- Three main stops: Kabukicho, Omoide Yokocho Memory Lane, then Shibuya Crossing.
- Meeting point is in Shinjuku—you’ll want a buffer time because Shinjuku stations are huge.
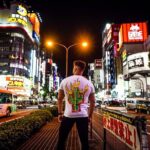
Neon street practice in Shinjuku and Shibuya
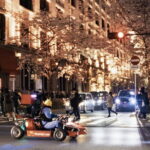
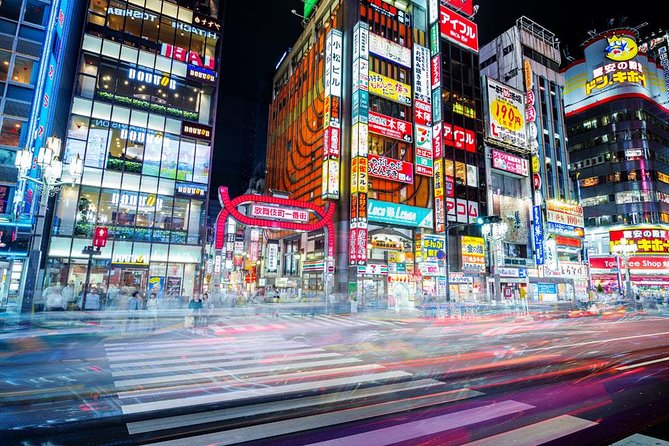
Tokyo’s night photography isn’t about one magic viewpoint. It’s about learning how to work with light you don’t control—signs flicker, crowds surge, and the city keeps changing every few minutes. That’s why this tour feels so usable: it turns Shinjuku’s neon backstreets into a training ground, then caps the experience at Shibuya Crossing where motion and scale are the whole point.
The “cyberpunk” vibe isn’t a gimmick. Kabukicho and the lanes around it have that dense signage glow that naturally supports long exposures. Then Shibuya Crossing gives you the famous wide-angle chaos—where you can experiment with shutter speed to balance sharp subjects, light trails, and the blur of thousands of feet.
The tour is positioned for people who want the look of Blade Runner–style streets without needing to be a photo pro. The instructor teaches the settings and the choices that get you there, whether you’re using a camera or a smartphone.
You can also read our reviews of more photography tours in Tokyo

The 3-hour flow and why the timing works
The experience runs about 2.5–3 hours in the evening. That matters because night photography rewards momentum. In Tokyo, you’ll often get better results by practicing in quick loops: try a setting, move a few meters, reframe, and try again as lighting changes.
Here’s the basic structure:
- You start near Shinjuku, in an area loaded with night energy.
- You spend the bulk of the time photographing Shinjuku streets.
- You then head to Shibuya by train at your own expense.
- The tour ends at Shibuya Crossing with time to keep shooting right at the action.
Group size is capped at 4 travelers, which helps a lot. It also means the guide can’t take a slow “everyone stop and stare” pace. You should plan to move, shoot, and reassemble quickly.
If you’re traveling on a tight schedule (first night in Tokyo, or only one evening with daylight adventures), this timing is ideal. It’s long enough to learn and test, but not so long that you’re slogging through the whole night.
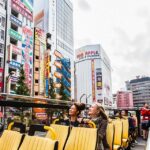
Getting started at Happy Lemon Keio Shinjuku (7:00 pm)
You meet at Happy Lemon Keio Shinjuku Shop, at 1-chōme-1-4 Nishishinjuku, Shinjuku City. Start time is 7:00 pm.
Two practical tips:
- Show up early and plan for confusion. Shinjuku is massive. One common hiccup is simply finding the group if you arrive right on time.
- Take your phone maps seriously. The meeting point sits inside a busy transit zone, so having a clear route from where you’re coming from will save stress.
The tour ends in Shibuya near 2-chōme-2-1 Dōgenzaka. That’s a helpful detail: after you’re done photographing, you’re close to where the night life continues, and you can sort out your next step from there.
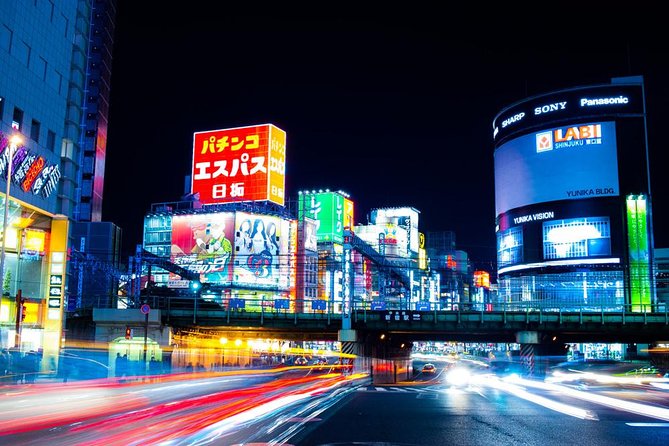
Stop 1: Kabukicho District (about 1 hour of neon)
Kabukicho is Tokyo’s nightlife heavyweight. Even if you’ve never heard the word before, the streets feel instantly familiar once you’re there: bright shop fronts, layered signage, and narrow streets where light reflects off everything.
In a photo tour, that’s the best kind of chaos. It gives you a lot of options in a short time:
- Neon signs for clean, high-contrast frames.
- People moving through bright lanes, which are perfect for candid street shots.
- Background layers that help your composition feel deep, even when the street is crowded.
This stop also tends to be where the tour “teaches you in action.” The instructor helps you get the basics into muscle memory—how to set exposure for night scenes, how to use motion intentionally, and how to keep your framing working even when crowds change positions.
If you’re shooting with a phone, this is also where guided phone technique pays off. One theme from the instruction style is adjusting what matters on-screen (things like contrast controls) and using the phone’s focus/exposure behavior rather than fighting it.
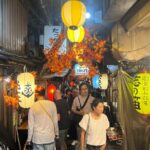
Stop 2: Omoide Yokocho Memory Lane (about 30 minutes)
Next is Omoide Yokocho Memory Lane, also known for tight spaces and lots of character. The biggest reason this stop is worth it is scale. After Kabukicho’s wide neon energy, Memory Lane feels more intimate—closer light, more texture, and a street rhythm that’s easier to “read” in photos.
Photo-wise, this is a great place for:
- Composition practice (leading lines, framing between signage and street elements).
- Story shots where you show context, not just glow.
- Experimenting with exposure so the lane feels alive rather than washed out.
The time here is shorter (about 30 minutes), so you’ll want to keep your gear ready. If you spend too long on one shot, you can lose your best angles before the group moves on. This is also a spot where a steady pace helps everyone.
And if the city throws rain your way, this kind of lane can still work. One common plus noted is that the instructor can adapt when weather changes, so don’t assume you’re stuck with nothing but umbrellas.


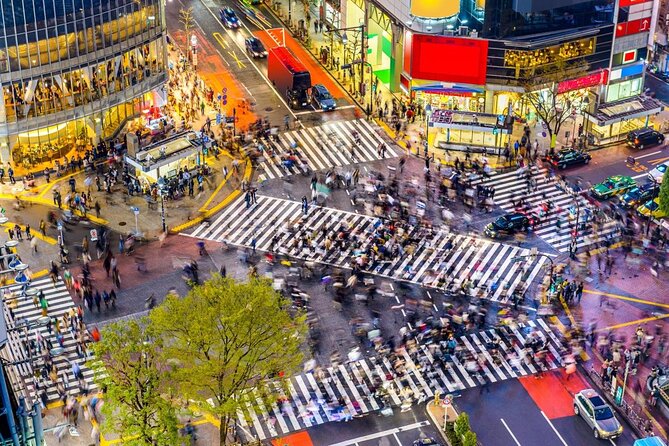
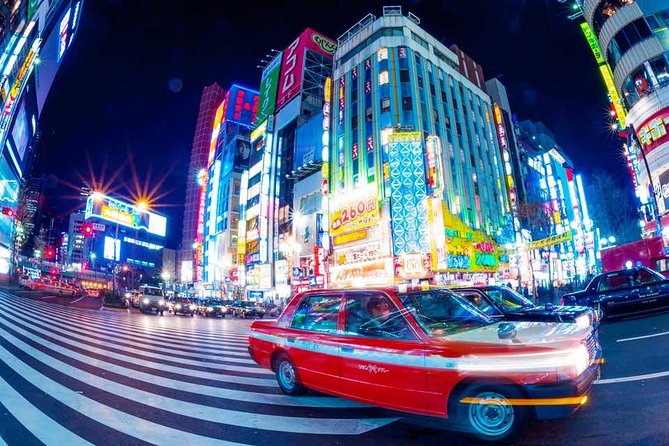
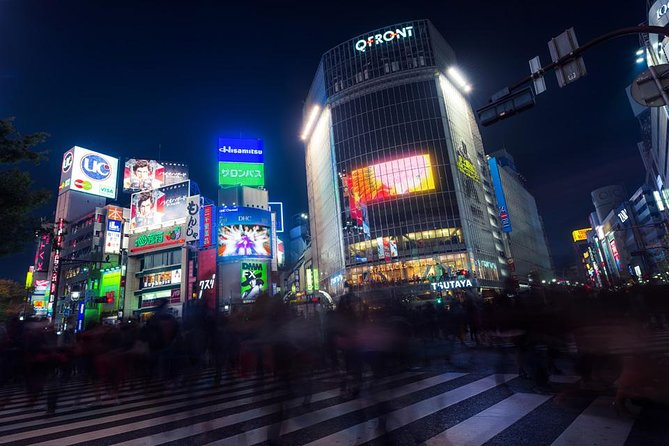
Stop 3: Shibuya Crossing (about 45 minutes of motion)
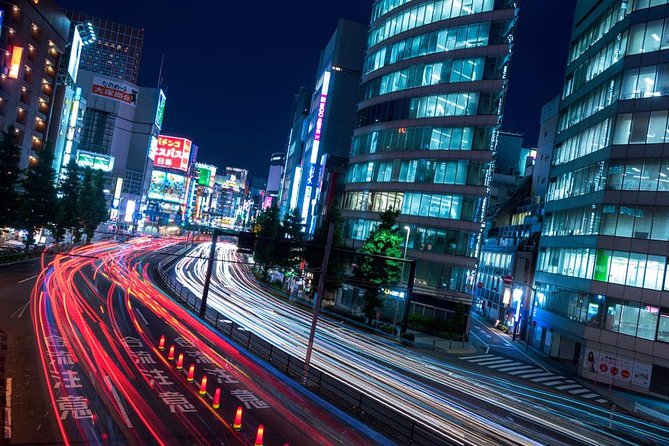
Shibuya Crossing is the grand finale for a reason: it’s the place where motion becomes the subject. You’re photographing thousands of people, multiple layers of signage, and constant movement—all at once.
This is where long exposure technique turns into something you can actually control. With the right settings, you get:
- Light trails from car traffic and illuminated signage.
- Crowd blur that shows energy without making the whole image unreadable.
- A sense of scale that a single street photo often can’t deliver.
You also get the satisfaction of practicing on the city’s most famous “set piece,” without having to plan the perfect shot timing yourself. And since the tour ends at Shibuya, you’re already in position to keep shooting on your own afterward if you want.
If you’re a first-time night shooter, this is a forgiving place to learn. The scene is bright enough that even with mistakes, you can usually salvage useful frames. That’s also why it’s a great stop for smartphone users—your camera handles more than you think in bright neon zones, and the guide’s tips help you optimize what your phone is already doing.
How the instructor teaches camera settings and phone tricks
This tour includes a professional photography instructor, and that’s the real value. You’re not just being walked around neon. You’re being coached so you understand what to change next time you see a scene like this.
What stands out is the practical approach:
- The guide helps you with camera settings for night shots, especially exposure choices and how to handle moving light.
- For smartphone shooters, guidance often focuses on how to use the phone’s controls instead of letting the phone decide everything.
- The instruction is hands-on, often described as a mix of demonstration and then immediate practice.
A few phone-related details have shown up repeatedly in feedback: things like knowing where key controls are (contrast-related sliders) and using functions that help you avoid accidental resets while shooting. If you use a camera, the guide also helps you get shutter speed/exposure into a workable range for long exposure results.
Also, you’re not left stranded. Many people highlight that the instructor watches what you’re doing and offers specific feedback, including adjustments to improve framing and settings. This is where the small group size matters: you can actually get your questions answered before you move on to the next location.
Gear advice for cyberpunk night shots (camera or phone)
You don’t need pro gear to enjoy this, but you do want to show up ready for low light. Here’s a sensible checklist based on what’s clearly emphasized in instruction style and feedback:
- Your camera or phone, fully charged.
- A way to control exposure in some fashion. The tour is built around night technique, so a camera with manual control—or a phone with night modes and manual-like controls—helps.
- Consider a tripod if you have one. It’s especially useful for long exposures where you want clean light trails and less blur from camera shake. The lane scenes and crossing areas are both where tripod support can pay off.
The key is not the exact gadget. It’s consistency. Try a setting, take a few frames, then tweak one thing at a time. That’s how the night stops being random.
And because you’ll be walking, don’t bring anything you can’t manage in crowds. The tour moves through busy areas, so keep your setup quick and repeatable.
Price and value for $184.99 per group (up to 2)
At $184.99 per group (up to two people), this isn’t a cheap add-on. But it can still feel fair if you look at what you’re actually buying: three high-impact photo locations in one evening, plus a trained instructor focused on getting usable results.
Here’s how the value works in practice:
- If you’re traveling with someone, the per-group model can be a good deal compared to paying individual prices for instruction.
- If you’re a beginner, the coaching can save you from wasting your first night trial-and-error on long exposure settings.
- If you’re already comfortable with photography, the tour still helps because it points you toward strong shooting positions and fast composition tactics in crowded places.
The main “value risk” is time. If you’re expecting a slow stroll with lots of free roaming and deep detours, you may feel the schedule is tight. One feedback point is that the pace can be quick, and you’ll need to keep up to get the full benefit.
What to watch for: pace, crowds, and where you might fall behind
Tokyo night photography is glamorous in photos and chaotic in real life. This tour goes through big crowds and busy streets, so you should expect:
- fast-moving pedestrian patterns,
- moments where you’ll need to step quickly to find your angle,
- and occasional crowd obstruction of your frame.
The biggest caution from feedback is simple: if you stop often to troubleshoot or lag behind, you may lose the group and the final portion of the tour. That’s not unique to this tour; it’s how small-group photo walks work in high-traffic areas.
So my advice:
- Keep your camera settings ready before you reach the shot zone.
- If you need a break, communicate with the instructor rather than vanishing.
- Wear comfortable shoes. You’ll be on your feet.
Should you book the Tokyo Cyberpunk Street Photo Tour?
Book it if you want a guided way to get strong Shinjuku + Shibuya night photos without spending a night planning where to stand. It’s especially worth it if you’re using a phone and want actual tips on what to change, or if you want to practice long exposure and street composition with feedback in the moment.
Skip it (or consider another format) if you need a slow pace, have limited mobility, or don’t like moving through crowds with a strict time plan. If you’re someone who enjoys wandering independently and taking your time in one spot for an hour, you might find the schedule too structured.
FAQ
FAQ
How long is the Tokyo Cyberpunk Street Photo Tour?
It runs about 3 hours (approximately 2.5 to 3 hours total).
How many people are in the group?
The tour is small group sized, with a maximum of 4 travelers.
Where does the tour start and end?
It starts at Happy Lemon Keio Shinjuku Shop in Shinjuku at 7:00 pm, and it ends near 2-chōme-2-1 Dōgenzaka in Shibuya.
What areas do you photograph during the tour?
You’ll photograph the Kabukicho District, Omoide Yokocho Memory Lane, and finish at Shibuya Crossing.
Do I need a camera, or can I use a smartphone?
The tour is designed for both cameras and smartphones, and the instructor provides photography tips for either.
Is transportation included?
Bus fare is not included. The route includes a train ride to Shibuya at your own expense.
What happens if the weather is bad?
The experience requires good weather. If it’s canceled due to poor weather, you’ll be offered a different date or a full refund. The experience is non-refundable and cannot be changed for any reason.