REVIEW · TOKYO
Tokyo: Origami Fun for Families & Beginners in Asakusa
Book on GetYourGuide →Operated by Taro's Origami Studio · Bookable on GetYourGuide
Fold paper art in under an hour. In Asakusa, this tablet-guided origami session turns a blank square into animals, flowers, and vehicles fast, and you get to pick from 100+ models and 50 paper colors. I like that it’s low-pressure for beginners, with staff close by if you get stuck. My one caution is time: you only have 45 minutes, and it’s not a private, teacher-led lesson where someone custom-teaches every step.
The studio also feels calm and practical. You sit down, choose a model on a screen, pick your color at the paper wall, then follow the on-table instructions while you fold. You can take photos during the session, and you’ll have an easy studio routine that works well for families and first-timers.
There are a few real-world details to plan around. You need to wear socks (or buy a pair beforehand), and the place isn’t handicap accessible because it’s stairs only with seating that doesn’t have back support.
In This Review
- Key Highlights You’ll Actually Care About
- Asakusa Setting: Where This Origami Break Fits in Tokyo
- Price and Time: Is $27 for 45 Minutes Good Value?
- Finding Taro’s Origami Studio on the Right Side of the Building
- Before You Sit Down: Socks, Stairs, and Age Guidance
- The 45-Minute Flow: Step-by-Step How the Tablet Guides You
- Choose a model on the tablet
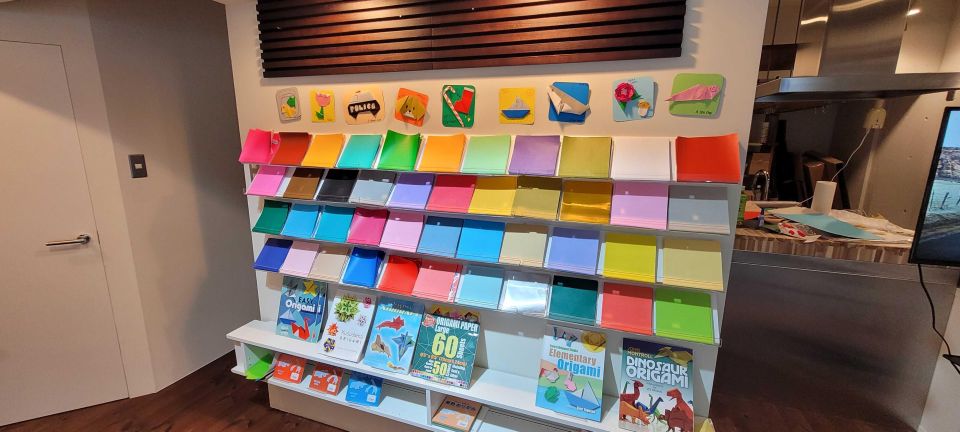
- Pick your paper color at the paper wall
- Press Play and follow the steps
- Decorate and personalize
- Instructor Support Without the Pressure: What Help Looks Like
- What You’ll Make: Animals, Flowers, Vehicles, and More
- Photos, Displays, and Taking Something Home
- Who This Workshop Fits Best (And Who Might Feel Frustrated)
- Family Practicalities in Asakusa: Easy Wins and Small Gotchas
- Should You Book This Asakusa Origami Session?
- FAQ
- How long is the Tokyo Asakusa origami experience?
- What does the price include?
- Is this experience suitable for beginners?
- Is it teacher-led?
- How many origami models and paper colors are available?
- What is the recommended age range?
- Do kids need adult supervision?
- What should I bring to participate?
- Is the studio wheelchair accessible?
- Can I cancel for a full refund?
- Can I take photos during the activity?
Key Highlights You’ll Actually Care About
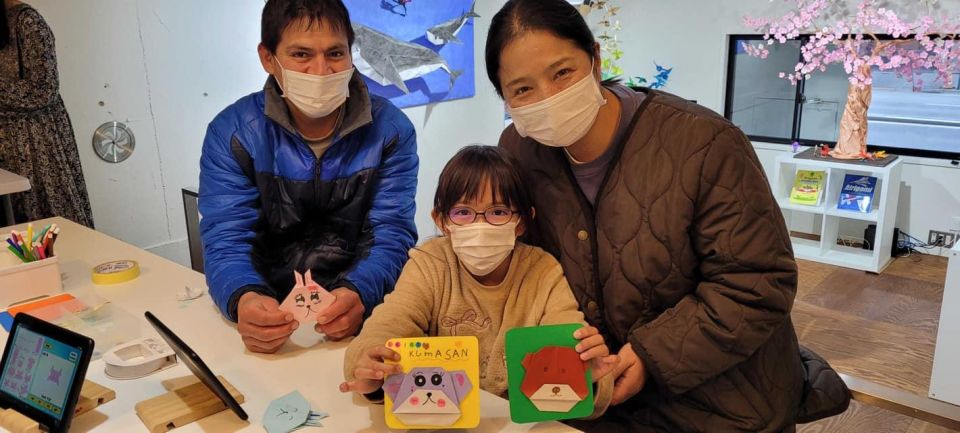
- Tablet menu with 100+ models in a format that’s friendly for first-time folders
- 50 colors of origami paper, plus stickers and stamps for finishing touches
- Small group size (max 6) for more attention and less waiting around
- Staff help without taking over so you stay in control of your own folds
- Socks required and the studio is stairs-only (plan shoes and mobility)
Asakusa Setting: Where This Origami Break Fits in Tokyo
Asakusa is one of those Tokyo areas where you naturally spend time walking, snacking, and browsing. So this origami workshop fits nicely as a break from the street—especially if your day involves a lot of temples, shopping, and crowds. You’re in a tourist-famous neighborhood, but the activity itself is inside, seated, and focused.
Think of it like a short creative “reset.” You arrive, you choose what you want to make, and you fold at your own pace within the session limits. It’s not trying to be a long class or a rigid script. You get structure from the tablet, but you’re not locked into a single design.
Also, the small group size matters here. With a limit of 6 participants, you’re less likely to feel rushed or ignored. And staff presence means you can ask for help without needing to get the attention of a single teacher in a busy classroom.
You can also read our reviews of more tours and experiences in Tokyo.



Price and Time: Is $27 for 45 Minutes Good Value?
At $27 per person for a 45-minute session, this isn’t the kind of activity that’s trying to feel “cheap.” The value is in what’s included and how efficient the format is:
- Origami paper and supplies are provided
- Instructions are built into a tablet system
- Taxes and fees are included
You’re paying for a ready-to-go creative setup: choices, materials, and guided steps. If you’ve ever tried learning origami from a book while traveling—where the paper quality, step clarity, and focus are all hit-or-miss—this kind of structured guidance is a big upgrade.
Will you finish a dozen models? Probably not. But the goal is practical: create a few pieces you’re proud of without turning the session into an all-afternoon project. Many people end up making roughly a handful of figures in the time slot, especially once they get past the first folds.
If your family has varying skill levels, the tablet format also helps. It supports beginner-to-intermediate difficulty, and you can replay steps or backtrack when something doesn’t look right.
Finding Taro’s Origami Studio on the Right Side of the Building
Location in Asakusa is half the game, and the entrance detail is worth noting. The entrance is on the main street side of the building. If you’re near the park, you might be tempted to enter from the backside, but you won’t be able to. Look for company signage on the front, and a brown sea turtle affixed to the wall below the window.
This is the sort of small navigation point that saves time. When you arrive a little flustered (it happens in Asakusa), you’ll appreciate knowing exactly which side to look at.
If you’re going with kids, that clarity matters even more. Fewer detours means less waiting and less crankiness before folding begins.
Before You Sit Down: Socks, Stairs, and Age Guidance
Let’s get the practical requirements out of the way:
- You must wear socks to participate. If you don’t have them, you can purchase a pair beforehand.
- The studio requires stairs only. There are no ramps or lifts.
- Seating doesn’t have back support.
On ages, the guidance is pretty clear. The activity is recommended for children four and older. It’s not suitable for children under 4, and kids under 13 need adult supervision throughout the activity. If a child under 13 can’t fold independently, an adult should stay involved.
There’s also a basic health filter: it’s not suitable for people with a cold.
If you’re traveling with a multigenerational group, this is one of those activities where the rules actually help. Clear expectations reduce friction: socks, supervision, and the “you’re folding at your own table” setup.
The 45-Minute Flow: Step-by-Step How the Tablet Guides You
The session is designed as a simple cycle you can repeat for each model you choose. Here’s the order you’ll follow:






Choose a model on the tablet
Using the touchscreen menu, you select an origami model from the available categories. Over time, you’ll likely notice that beginners do better when they start with one or two designs they can finish confidently—then branch out.
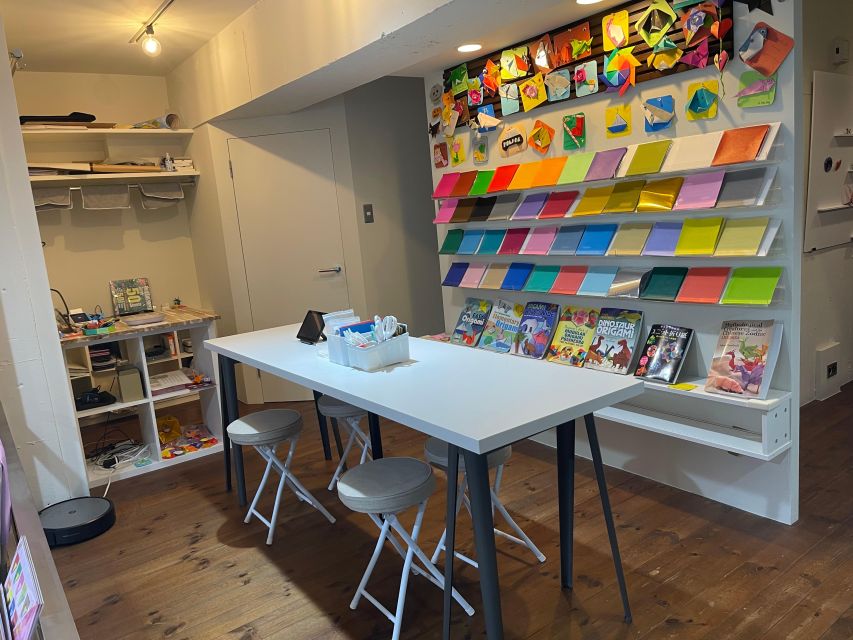
Pick your paper color at the paper wall
You head to the origami paper wall and choose from 50 colors. If you’re folding something that has a natural color (like a flower) you’ll probably want to pick a matching tone. If your kid is choosing, let them pick the color first—then pick the model to fit the color.
Press Play and follow the steps
Back at the tablet, you press the Play button to begin. The system is built so you can replay or return to earlier steps if a fold doesn’t look right. That makes it more forgiving than many printed instructions.
Decorate and personalize
Once a model is complete, you can add stickers, stamps, and markers. This is where your creations stop feeling like exercises and start feeling like keepsakes. It also makes the activity fun for families, because the “finishing” part can be customized quickly.
What I like about this workflow is that it reduces decision fatigue. You’re not trying to figure out the next step while also hunting for tools or flipping pages. The structure keeps you moving.
Instructor Support Without the Pressure: What Help Looks Like
This is a key distinction: it’s not a private, teacher-led lesson where the instructor stands over you and runs through everything. Instead, staff members are present to help participants with their origami models.
In practice, that means you’re mostly working off the tablet instructions, and you can ask for help when something specific doesn’t work. People often find this style comfortable. You get guidance when needed, but your hands still control the final result.
Some sessions include instructors who explain clearly even for first-time folders. One example name that comes up is David, who’s described as giving a wonderful, clear explanation and helping people fold figures step-by-step. Even when you’re not getting that exact one-on-one style, the general support approach is similar: help is available, but you’re not being micromanaged.
If you’re worried that “not teacher-led” means you’ll be left alone, don’t. The staff presence is there for real assistance, especially when your folds go sideways.
What You’ll Make: Animals, Flowers, Vehicles, and More
The model list is big—over 100 different origami models—and that’s why the tablet format matters. You’re not stuck with one choice. You can pick animals, flowers, vehicles, and other designs, then keep folding as many as you’d like within the time window.
In a 45-minute session, your best strategy is to pick models with a clear path to completion. Start simple, then move up a notch. That way you’ll leave with multiple finished pieces instead of chasing one complicated project too long.
If you’re traveling with kids, this variety helps you match energy levels. A child might want something animal-shaped and bold-looking, while an adult might enjoy a slightly more detailed model. The setup supports both without forcing everyone into one design.
Photos, Displays, and Taking Something Home
You can take photos throughout the experience. That’s a big deal in activities like this because you’ll want proof of progress—especially for kids who are learning a new skill.
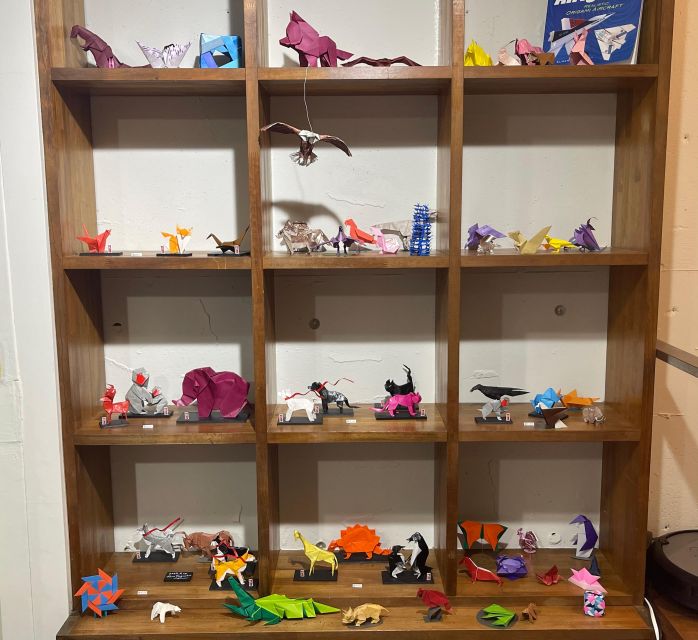
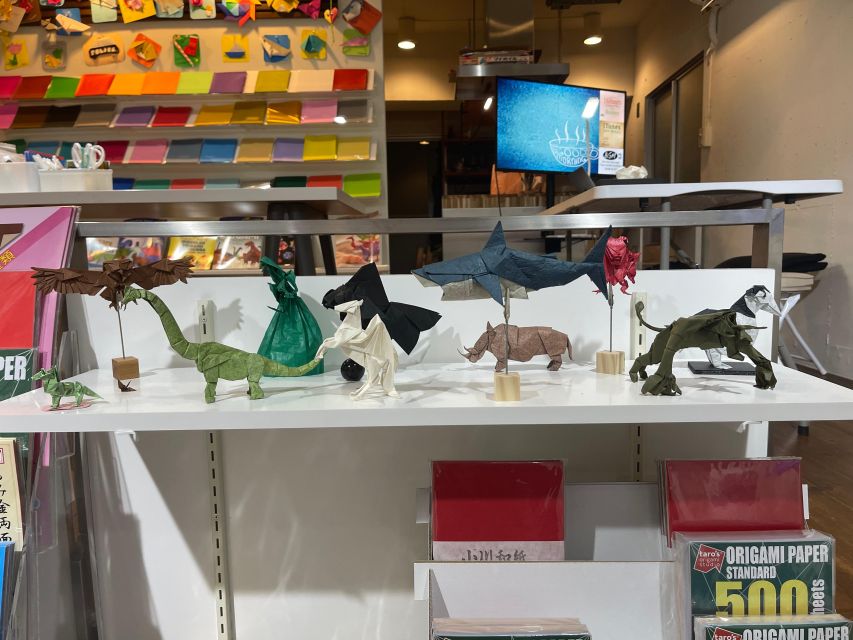
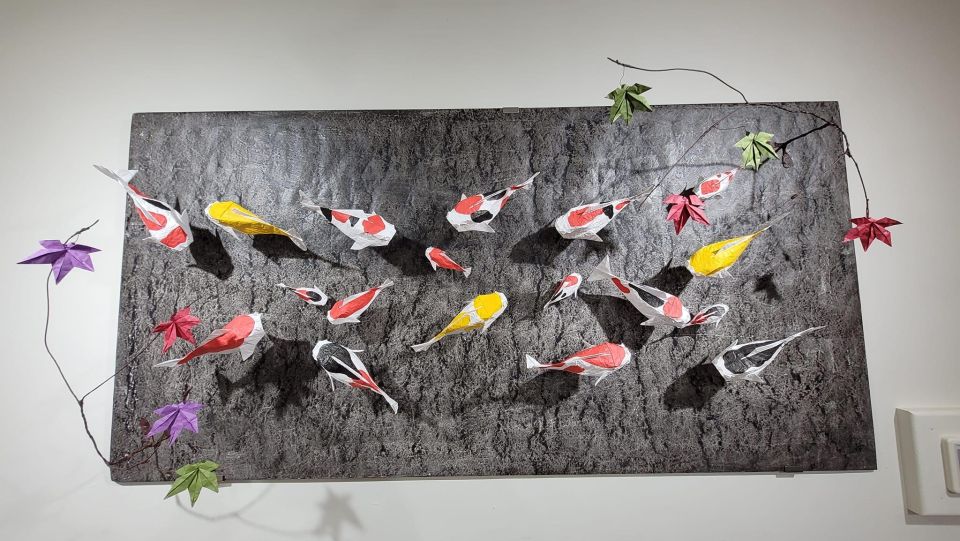
There are also origami displays to enjoy during and after your session. And you can make purchases in the studio, too. So you’re not just leaving with your own folded pieces; you can also browse what’s on display.
This matters because origami can feel temporary. A finished paper model is easy to lose or fold away. Adding photos and browsing a few examples helps you turn the workshop into a real memory.
Who This Workshop Fits Best (And Who Might Feel Frustrated)
This is ideal if you want:
- A beginner-friendly activity with clear step guidance
- A family project that doesn’t require prior origami skills
- A short, structured break in Asakusa
It’s also a good fit if you like independent learning. The tablet does the heavy lifting, and staff support fills the gaps. You’re active the whole time, which is rare for many “cultural experiences” that can feel more like watching than doing.
You might feel a bit frustrated if:
- You want a long, deeply guided class with lots of teaching time
- Your group includes someone who can’t follow instructions without an instructor standing there the entire session
- Your mobility needs are complex, since it’s stairs-only and the seating has no back support
If you come in with realistic expectations—fold a few models, enjoy the process, leave proud—you’ll get what you came for.
Family Practicalities in Asakusa: Easy Wins and Small Gotchas
This workshop is designed to work for kids, but the “small gotchas” are real. Here’s what I’d plan for:
- Socks are mandatory. Pack them or plan to buy. Don’t show up with bare feet.
- Adult supervision for kids under 13. If you’re bringing a 7-year-old, plan on staying involved.
- The studio is stairs-only. If someone in your group struggles with stairs, this can be a dealbreaker.
- Seating doesn’t have back support. If someone needs better lumbar support, you’ll want to think ahead.
One practical tip: arrive a touch early so you’re not rushing into socks-and-stairs mode. In a tourist neighborhood like Asakusa, that cushion time helps.
Should You Book This Asakusa Origami Session?
I think this is worth booking if you want a short, hands-on beginner activity in Asakusa that’s genuinely structured. The combination of tablet step-by-step guidance, a large menu of 100+ models, and 50 paper colors makes it a strong value. Add staff help nearby, and you get a “guided enough” setup that’s hard to mess up.
Skip it if you’re looking for a long, teacher-led lesson, or if stairs are a major problem for your group. Also, if someone in your party has a cold, this isn’t the right fit.
If your goal is to create a few nice paper models, learn the basics without stress, and bring home something tangible from Tokyo—this $27, 45-minute origami session is a smart pick.
FAQ
How long is the Tokyo Asakusa origami experience?
The session lasts 45 minutes.
What does the price include?
It includes origami paper and supplies, instruction, and taxes and fees.
Is this experience suitable for beginners?
Yes. It is accessible to beginners, and the tablet guidance supports beginner to intermediate difficulty.
Is it teacher-led?
No. This is not a teacher-led private lesson. Staff members are present to help with participants’ models, but you follow the tablet instructions.
How many origami models and paper colors are available?
You can choose from over 100 origami models and 50 colors of origami paper.
What is the recommended age range?
It is recommended for children four and older. It is not suitable for children under 4.
Do kids need adult supervision?
Yes. Kids under 13 need adult supervision throughout the activity.
What should I bring to participate?
Bring socks. Socks must be worn to participate, and you can purchase a pair beforehand if needed.
Is the studio wheelchair accessible?
No. The facility is not handicap accessible. There are no ramps or lifts, only stairs, and seating has no back support.
Can I cancel for a full refund?
Yes. You can cancel up to 24 hours in advance for a full refund.
Can I take photos during the activity?
Yes. You can take photos throughout your experience.


![[1 Group Only] Explore Tokyo Ginza Food Tour for Family - The 6:00 pm start: why this timing works](https://e.thetokyoexplorer.com/wp-content/uploads/1-group-only-explore-tokyo-ginza-food-tour-for-family-400x267.jpg)