REVIEW · TOKYO
Urban Geometry with Laurence Bouchard
Book on Viator →Operated by Laurence Bouchard · Bookable on Viator
Tokyo turns graphic when you learn to see it. This workshop led by photographer Laurence Bouchard shows you how to frame Tokyo like a photographer, using high-contrast black-and-white ideas to turn ordinary corners into strong compositions. I like that you get practical feedback tailored to your camera and skill level, not generic tips that ignore what you’re actually shooting.
One thing to plan for: you’ll need 100% battery on your phone and camera, because you’ll be using them through multiple stops.
In This Review
- Key highlights to know before you go
- Tokyo photography that teaches you how to see
- Ebisu Garden Place: shadow lines you can frame fast
- Roppongi: hidden spots and less obvious compositions
- National Art Center, Tokyo: glass facades and contrast control
- Tokyo International Forum through Yurakucho: layered depth in modern spaces
- How Laurence Bouchard’s feedback makes your photos better
- Practical shooting tips for a successful 4-hour session
- Price and value: why $130 can be worth it
- Who should book this workshop (and who might not need it)
- Quick booking and readiness checklist
- Should you book Urban Geometry with Laurence Bouchard?
- FAQ
- Where does the workshop start and end?
- What time does the session begin?
- How long is the workshop?
- How much does it cost?
- Is there a maximum group size?
- Is there a mobile ticket?
- Do I need to charge my phone or camera?
- Should I bring a Suica or Pasmo card?
- What kind of photography style does the workshop focus on?
- What if I need to cancel?
- How far in advance do people usually book?
Key highlights to know before you go
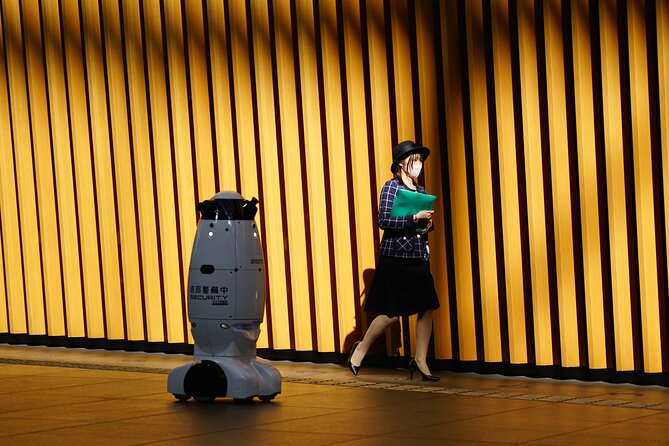
- Photographer-led routes that avoid the usual tourist march and focus on lines, shadow, and reflection
- Black-and-white, high-contrast training so you learn a style you can reuse anywhere
- Real feedback that matches your camera and skill level, plus hands-on help in the moment
- Small group size with a maximum of 6 for more attention
- Built-in “seeing exercises”: you’re not just taking photos, you’re learning how to notice
- A stop list with strong light conditions: Ebisu to Roppongi to major modern architecture
Tokyo photography that teaches you how to see
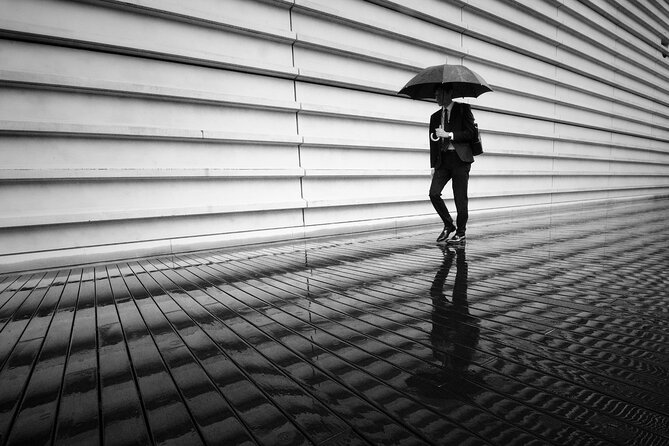
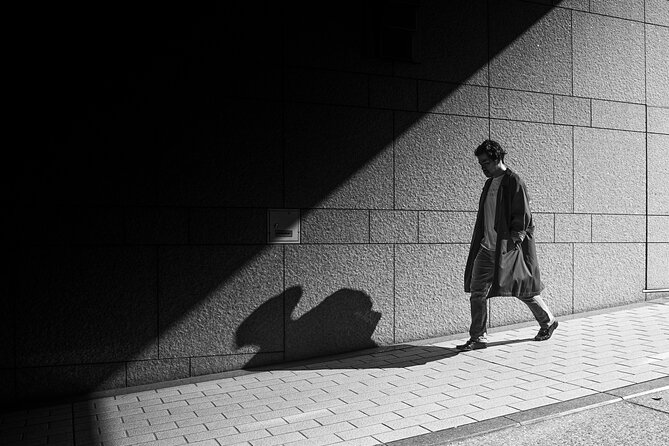
If you’ve ever pointed your camera at Tokyo and thought, Okay, cool… but also, why does it look like every other photo?—this workshop is for you. The goal isn’t to hunt for the “right” attraction. It’s to train your eye to recognize geometry: repeating lines, sharp shadows, reflective surfaces, and bold contrasts. That changes everything, because you stop photographing places and start photographing structure.
Led by Laurence Bouchard, the pace is practical. You’ll move through specific areas, shoot, then get guidance on how to improve what you captured. Because it’s a small group (up to 6), the feedback stays usable. You’re not stuck waiting your turn while everyone else gets coached.
You’ll also leave with something more valuable than a stack of pictures: a method. The workshop explicitly builds techniques you can carry to any city. Tokyo is the classroom; the skills are the takeaway.
You can also read our reviews of more tours and experiences in Tokyo.

Ebisu Garden Place: shadow lines you can frame fast
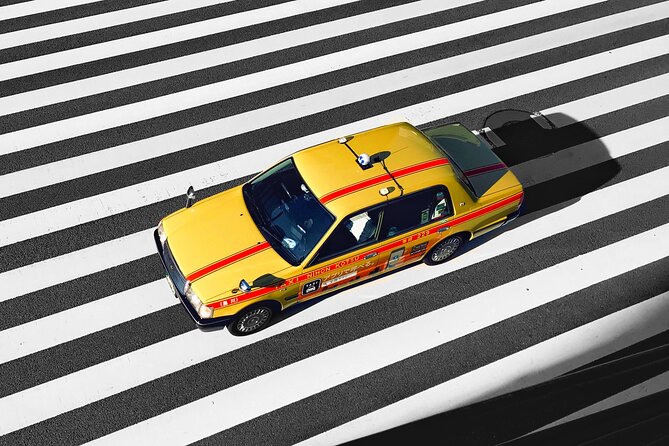
You begin in Ebisu at Garden Place, a spot known for architectural rhythm. The canopy and trellised structure cast shadows in clean, readable shapes, which makes it ideal for black-and-white work. This is where you get your first lesson in “seeing with intent.”
What I like about starting here is that the subject is forgiving. You don’t need a perfect street character to make a compelling image. You can build strong compositions around light and shadow patterns—tilting upward for the canopy structure, or lowering your angle to emphasize repeating geometry on the ground.
Practical tip: in this first segment, spend time testing framing rather than rushing to capture. Try a few variations—wider for context, tighter for graphic patterns—then compare them in your head. Laurence’s approach pushes you to think about why one frame reads as structure while another just looks like “a nice photo.”
Potential drawback at this stage: if you’re low on battery, this is where it bites you. The workshop notes call out the need for a 100% charge, and you’ll notice why—Tokyo’s light changes quickly, and you don’t want to stop mid-session.
Roppongi: hidden spots and less obvious compositions
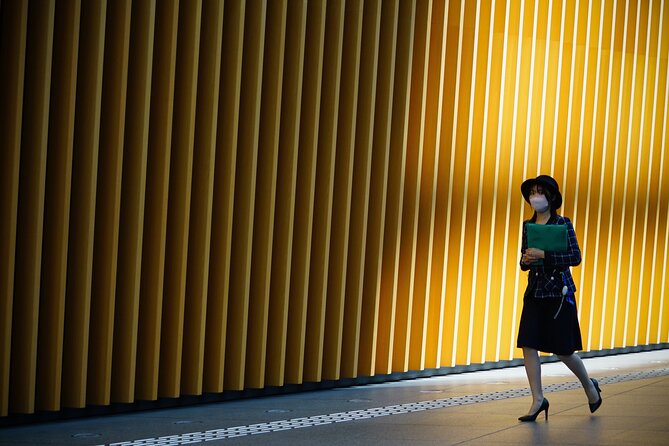
Next comes Roppongi. This is where the workshop shifts from “big architectural shapes” to “how to find the interesting angle.” You’ll look for less crowded pockets and spots with strong visual cues—again, focused on patterns, shadows, and reflections rather than sightseeing checklists.
Roppongi can be busy, so the coaching matters. A couple of reviews mention Laurence explaining the idea behind the frames and even stepping in to help when there aren’t good subjects to photograph. That’s genuinely helpful in a street photography workshop: sometimes the environment is perfect for geometry, but you still need a scale reference or a human element to anchor the story. When he models in the quieter spaces, you get a clear, real-world example of how composition works.
You’ll likely experiment with timing, too. In a city like Tokyo, tiny changes in pedestrian flow can make or break a shot with symmetry. Use short windows: shoot quickly, then pause, then shoot again. That rhythm helps you catch the moment without burning time.
National Art Center, Tokyo: glass facades and contrast control
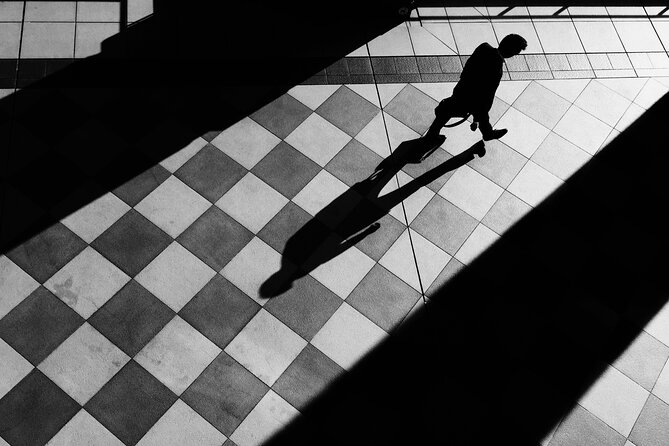
Then you move into the National Art Center, Tokyo, where the visual payoff gets serious. The building’s massive glass facade is a photography playground for high-contrast and black-and-white shooting. Glass does two things well: it reflects the environment and it bends light through its surfaces, so you get layers in a frame.
This is a smart stop for your skills because it forces you to manage contrast. In black-and-white, highlights and shadows become your story. You’ll start thinking in tones, not color. You’ll also see how small adjustments—angle, lens position, and even when you press the shutter—change the lines that appear on the facade.
One practical way to approach this stop: look for a “frame inside the frame.” The architecture can naturally create borders using reflections and edges. Instead of photographing the whole facade like a postcard, you try to isolate the geometry that looks strongest from where you’re standing.
Also, because this is a structured environment, you can slow down. Use it to test a technique you’ve been learning: perhaps shooting from a lower vantage point, or focusing on the shadow cast by one section onto another. This is where your compositions start to look more intentional and less accidental.
Tokyo International Forum through Yurakucho: layered depth in modern spaces
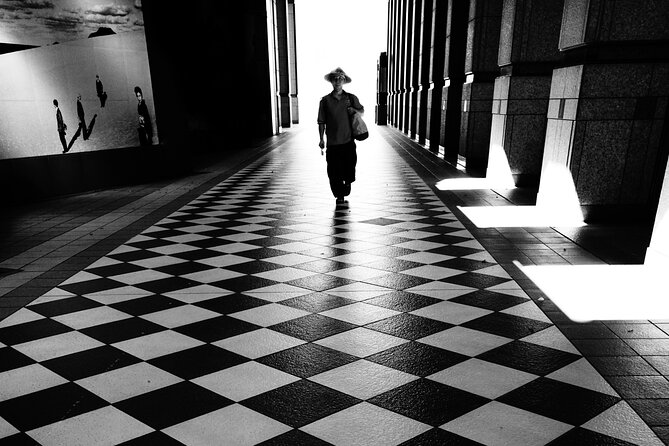
The final phase heads toward Yurakucho, exploring the hidden depths around the Tokyo International Forum. This stop is different from the earlier architecture because it’s more about uncovering “what’s behind the obvious.” Think of it as a lesson in proximity: the most interesting geometry might be just off the main walkway.
This kind of environment works well for pattern-based photography. You can look for repeated beams, structural divisions, and surfaces that catch light in a way that makes the scene read in graphic terms. Even if the area feels modern and clean, you can still get a sense of depth by choosing vantage points where foreground elements cast shadows or reflect into the mid-ground.
Why the Yurakucho approach matters: it pushes you to stop relying on one obvious landmark. Instead, you practice spotting composition opportunities where most people keep walking.
If you’re shooting black-and-white, watch for surfaces that hold strong tonal differences. Bright panels and darker gaps give you a natural structure. Use that. Then simplify your framing so the viewer’s eye moves along lines the way you intended.




How Laurence Bouchard’s feedback makes your photos better
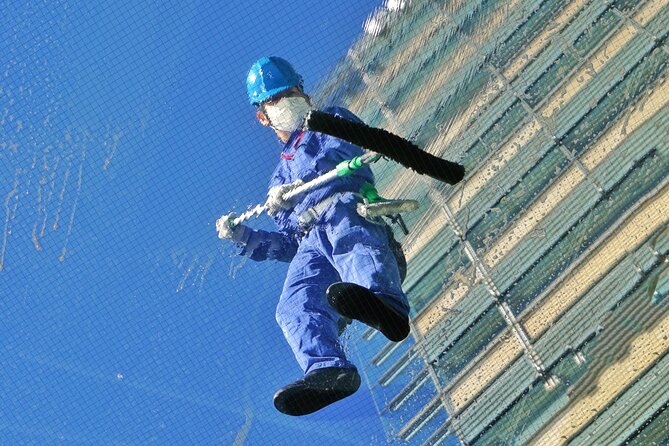
The most praised aspect of this workshop is not just the locations—it’s the coaching. Laurence doesn’t only show you where to stand. He explains the idea behind a frame and gives feedback that connects to what you’re actually trying to do with your camera.
That’s huge if you’ve ever taken a photo class where the instructor’s advice didn’t match your gear. Here, the workshop aims to tailor feedback to your camera and skill level. That means if you’re working with a smartphone, a compact camera, or an interchangeable-lens setup, you’re still guided toward improvements that fit your tools.
You’ll also learn from seeing your own shots discussed. Instead of vague encouragement, you get direction you can apply immediately. For street photography, that’s the difference between learning slowly and learning fast.
Small-group format helps too. With a maximum of 6 people, you’re not competing for attention. You can shoot, get input, adjust, and repeat. That loop is how you start building confidence instead of just collecting images.
Practical shooting tips for a successful 4-hour session
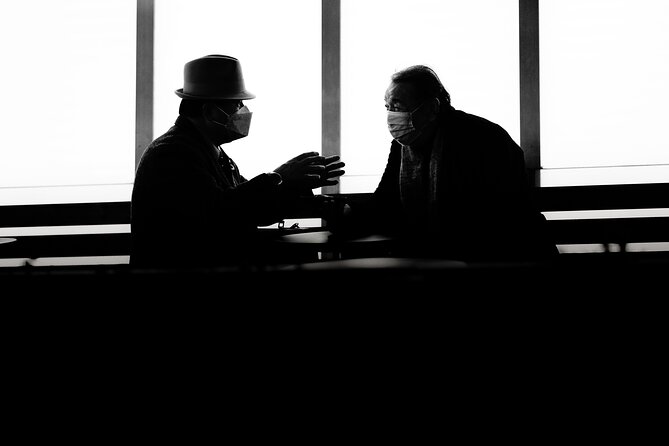
You’ve got about four hours and multiple stops, so you’ll want to shoot efficiently. The workshop makes that easy by structuring the experience around specific locations and photographic themes, but you still need a few basics lined up.
Here’s what I’d do to get the most out of it:
- Keep your battery charged. The workshop specifically notes 100% charge for your phone and camera, and you should take that seriously.
- Wear comfortable shoes. You’ll be moving through different areas, and photo time often means standing, stepping back, and re-framing.
- Bring a Suica or Pasmo if you can. It’s recommended for the metro, which helps you stay flexible if you need to move between points or handle your own transit logic.
- Think in sequences. Don’t judge a “good shot” only by the first frame. Take a quick set, then adjust angle, then take another quick set.
The other practical win is the workshop’s focus on timing, light, and framing. Those are the three levers you control in any city. Once you practice them here, you’ll feel more ready when you return home and want to apply the method elsewhere.
Price and value: why $130 can be worth it
At $130.31 per person for about four hours, this isn’t a “free walk with a tip” situation. It’s paid coaching plus targeted location time with a professional guide.
So is it good value? For the right person, yes—because you’re buying something hard to DIY: structured visual training plus real-time feedback. If you’ve tried shooting in Tokyo on your own, you already know the problem. Tokyo is amazing, but it can also overwhelm. A workshop like this compresses learning by showing you where to look and how to improve what you’re already doing.
The small group size also supports value. With a maximum of 6, the instructor can review your work and help you adjust on the spot. That turns the time from “watching someone else shoot” into “learning how to shoot better.”
If you’re totally new to camera settings and expect someone to spend the entire time explaining basics from scratch, you might find the guidance moves quickly. The workshop is best for people who want to shoot now and learn through doing, not people looking for a beginner crash course.
Who should book this workshop (and who might not need it)
This fits best if you:
- Want to take Tokyo photos that look designed, not default
- Are interested in black-and-white, high-contrast styles
- Like learning through feedback and practice, not just listening
- Travel with a camera (any type) and want guidance that connects to your skill level
- Prefer small groups where you can actually interact with the photographer
You might skip it if:
- You only want generic travel sightseeing and landmark photos
- You’re not interested in photography technique and want a purely relaxed stroll
- You’re unwilling to do some walking and standing time for framing
The workshop keeps you moving, but it’s not a sprint. It’s a focused photo session with enough structure to help you improve during the same day.
Quick booking and readiness checklist
A few details that matter because they affect your experience:
- Plan for the full battery requirement on both phone and camera
- Wear comfortable shoes for standing and moving between stops
- Use Suica/Pasmo if possible for metro convenience
- Go in with a mindset of practicing and adjusting, not just collecting photos
- Expect a small group (up to 6), so arrive ready to shoot and ask questions
Should you book Urban Geometry with Laurence Bouchard?
If you’re the kind of traveler who looks at photos and asks how they were made, book it. This workshop is practical: strong locations, a clear visual theme (lines, shadows, reflective surfaces), and feedback that aims to match your camera and your current level.
I’d especially recommend it if you want to leave Tokyo with images that feel like you understood the city’s “grammar,” not just where you went. The method is the real souvenir. You’ll likely return home thinking more like a photographer—simplifying scenes, emphasizing contrast, and composing with intention.
If you want postcard Tokyo with minimal effort, you’ll probably be happier doing a standard sightseeing day. But if you want to learn how to see Tokyo in graphic black-and-white, this is a well-structured way to do it in one morning.
FAQ
Where does the workshop start and end?
It starts at 4-chōme-2-6 Ebisu, Shibuya, Tokyo 150-0013, Japan. It ends back at the same meeting point.
What time does the session begin?
The start time is 9:00 am.
How long is the workshop?
It lasts about 4 hours.
How much does it cost?
The price is $130.31 per person.
Is there a maximum group size?
Yes. The workshop has a maximum of 6 travelers.
Is there a mobile ticket?
Yes. The experience includes a mobile ticket.
Do I need to charge my phone or camera?
Yes. You’ll need a 100% charge on your phone and camera.
Should I bring a Suica or Pasmo card?
The workshop notes suggest having a Suica/Pasmo card for the metro if possible.
What kind of photography style does the workshop focus on?
It focuses on high-contrast photography with black-and-white shooting.
What if I need to cancel?
Cancellation is free up to 24 hours in advance for a full refund.
How far in advance do people usually book?
On average, this is booked 36 days in advance.