REVIEW · TOKYO
Special sushi rolls only available in Japan Making Experience
Book on Viator →Operated by 優美会 · Bookable on Viator
Designer sushi is a whole lot of fun. In Tokyo, you can turn that fun into a real skill with a one-to-one private sushi class led by Yumi. You’ll choose playful themes like animals or characters, shape the rolls yourself, and leave with takeout-ready pieces you can show off later.
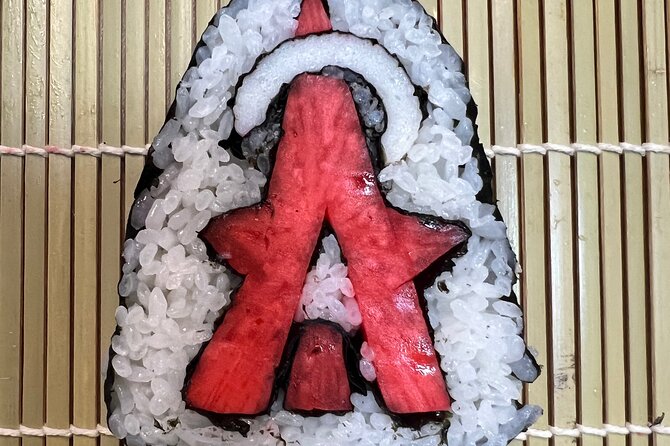
I especially love two things here. First, the step-by-step one-to-one tuition means you’re not guessing. Yumi guides you while you work, and you can ask questions as you go. Second, the finished rolls aren’t just “homemade”—they’re patterned and photogenic, like animal designs and even a Santa-style roll.
One possible drawback: the meeting point is in Shinkashiwa/Kashiwa (Chiba), and Tokyo setup depends on a special request. If you’re hoping for a Tokyo-only location, plan ahead and tell them where you want to cook.
In This Review
- Key highlights you’ll actually care about
- A one-to-one designer sushi class with Yumi’s exacting patience
- Where you’ll cook: Shinkashiwa meetup, then a home kitchen or communal kitchen
- The step-by-step workflow: colored rice to the final cut
- 1) Mix for colored rice
- 2) Cut seaweed and set up the layers
- 3) Layer decorations, then roll
- 4) Cut into four pieces to reveal the pattern
- Picking your theme: animals, characters, and photogenic patterns
- After you roll: wrapping up, then coffee, tea, and snacks
- Price and timing: what $40.97 buys you in real life
- Who this is perfect for (and who might feel underwhelmed)
- Small practical tips before you show up
- Book it or skip it: my honest recommendation
- FAQ
- How long does the sushi-making experience take?
- Is this a private experience?
- What’s included in the class?
- Can I choose the design for my sushi rolls?
- Do you teach beginners, or is it only for experienced cooks?
- What happens during the class step by step?
- Where does the experience start and end?
- Is there an option to do the class in Tokyo instead of Shinkashiwa?
- What’s the cancellation policy?
Key highlights you’ll actually care about
- One-to-one tutoring with Yumi, so you’re not stuck watching others
- Colored rice and decorations for designer rolls, not plain maki
- Cut-and-reveal patterning: you’ll slice the roll into four pieces to show your design
- Take-home containers provided, so you can transport your sushi after class
- Coffee, tea, and snacks right after rolling up your creations
- Private group setup, either at a home kitchen or a communal kitchen depending on group size
A one-to-one designer sushi class with Yumi’s exacting patience
Sushi-making in Japan can be intimidating—until someone stands next to you and actually shows your hands what to do. That’s the core value of this experience: you’re not herded through a factory-style class. You get private, one-to-one tuition, and Yumi teaches you step by step.
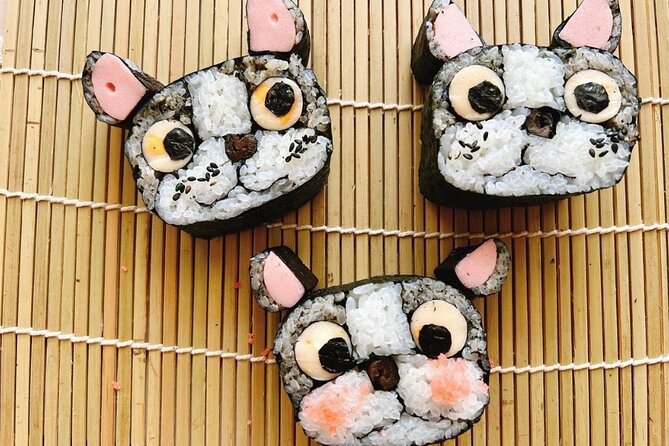
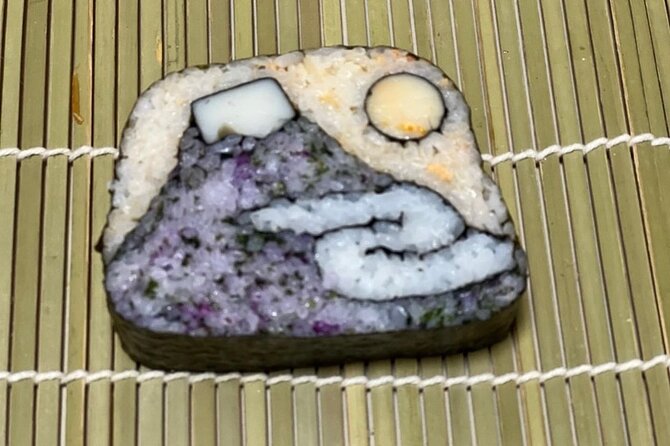
You also get to make sushi rolls that look like they jumped off a kid’s book or a character poster. The class is built around imaginative designs such as minions, flowers, Mount Fuji scenes, dogs, and cats. In other words, you’re not just learning technique—you’re making a little work of edible art.
A practical note: the experience runs about 2 hours. That’s long enough to learn and finish a roll, without eating your whole day. If you’re balancing this with sightseeing, it’s a good fit.
You can also read our reviews of more tours and experiences in Tokyo.



Where you’ll cook: Shinkashiwa meetup, then a home kitchen or communal kitchen
You’ll start at Shinkashiwa Clinic, in Shinkashiwa, Kashiwa (Chiba). The class ends back at the meeting point. It’s near public transportation, so you’re not dealing with an isolated countryside commute.
After you meet up, the kitchen situation depends on how many people are booked:
- If you’re a smaller group, you head to Yumi’s parents’ house kitchen.
- If you’re a larger group, you go to a communal kitchen.
Why this matters: a home kitchen can feel more personal and calm, and a communal kitchen can be more practical for handling more participants. Either way, you’re still getting instruction for your roll design and pattern.
If Shinkashiwa sounds too far and you’d rather do this while you’re already in Tokyo, you can request a Tokyo-area kitchen. The info specifically points to areas near Asakusa and Skytree. You’ll want to add that as a special request where you’d like to enter the cooking space.
The step-by-step workflow: colored rice to the final cut
This class has a clear rhythm. You’ll do the key actions that turn maki into a picture, not just a roll.
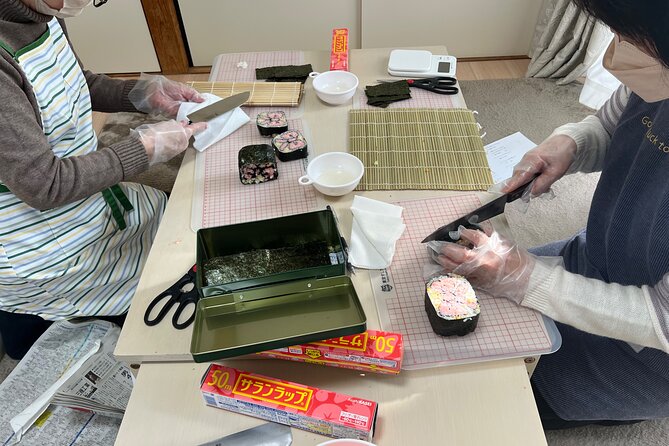
1) Mix for colored rice
You start by mixing sushi rice with ingredients to create colored rice. This is one of the big “designer roll” secrets. Plain rice won’t give you the same contrast that makes patterns pop after slicing.
If you’ve never cooked rice with intention before, this part is where you learn that sushi is as much about prep as it is about rolling.
2) Cut seaweed and set up the layers
Next comes seaweed cutting. You’ll get the seaweed ready, then it’s time to build the roll with your colored rice and decorations.
This is where you’ll appreciate the one-to-one approach. Rolling looks easy in videos. In real life, you need someone watching the spacing and density so your design doesn’t smear or vanish.





3) Layer decorations, then roll
You’ll put the colored rice and other decorations into the roll setup, then roll it up. The goal is to keep your pattern positioned so it shows after slicing.
You’re not doing this on “creative autopilot.” The instructor’s job is to guide you through the logic of where each part goes.
4) Cut into four pieces to reveal the pattern
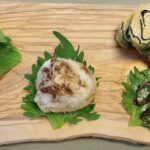
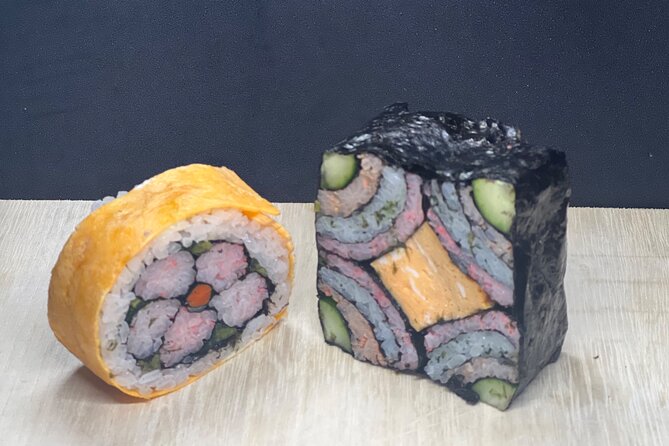
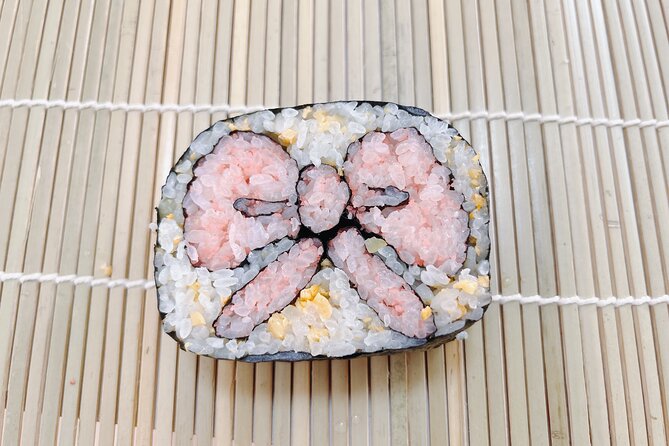
Finally, you cut your roll into four pieces. This is your reveal moment. The design you made—flower, animal, or a character-style theme—becomes visible in the sliced sections.
This is also a great teaching point. You’ll see instantly how your earlier choices affected the final look. That’s one reason this class feels like a real skill-building experience instead of a one-time craft.
Picking your theme: animals, characters, and photogenic patterns
The fun part is choosing what you’ll actually make. The class offers imaginative designs like minions, flowers, Mount Fuji scenes, dogs, and cats. You’ll be able to choose designs that match your personality, your camera, or the gifts you want to bring home.
The design focus shows up clearly in what people say afterward: beginners can still leave with something that looks carefully planned. One family shared making a Santa sushi roll, which is the kind of detail that tells you the instructor isn’t limited to basic patterns.
What you should do before you go: think of your “design priority.”
- If you want a look that reads clearly from a distance, go for bold shapes like animals or big character themes.
- If you care more about a gentle, pretty look, consider floral themes.
- If you like travel visuals, Mount Fuji scenes can feel very Tokyo/Japan-coded.
You’ll have ingredients provided by your instructor, so you won’t need to hunt for supplies. That keeps the class simple for visitors who just want to learn and create.
After you roll: wrapping up, then coffee, tea, and snacks
Once your sushi is done, you won’t just walk away with it raw and awkward. You’ll wrap the sushi rolls so they’re ready to take home, and you’ll get takeout containers provided for transporting your food.
Then you’ll have a relaxing break with coffee, tea, and snacks. This matters more than it sounds. Sushi class can be intense—hands moving, concentration high. A short reset helps you enjoy what you made instead of rushing straight into the rest of your day.
Price and timing: what $40.97 buys you in real life
At $40.97 per person for about 2 hours, you’re paying for a few things that don’t show up in cheaper DIY experiences:
- Personal instruction (one-to-one) rather than group coaching
- A structured process for building designer rolls, not just basic maki
- All ingredients supplied by the instructor
- Packaging so you can actually take your work with you
If you’ve ever tried to learn sushi from a YouTube video, you know the missing piece is feedback in the moment. Here, Yumi can guide your rolling and layering while you’re doing it. That’s where the value lives.
Also, the average booking window is about 56 days in advance, so if you’re traveling at a busy time, it’s smart to plan early rather than waiting.
Who this is perfect for (and who might feel underwhelmed)
This class is a strong match if you:
- Want hands-on food fun in Tokyo but don’t want the stress of figuring things out alone
- Care about photos and finished results that look like something specific (animals, characters, floral designs)
- Are traveling as a family or small group and want patience from an instructor—people note Yumi and her team being accommodating, including with young kids
It may be less perfect if you:
- Are only interested in classic, traditional sushi techniques and don’t want design-focused work
- Are tightly scheduled in central Tokyo and don’t want to deal with a start point in Shinkashiwa unless you successfully request the Tokyo kitchen option
Small practical tips before you show up
These aren’t “mystical secrets.” They’re just smart traveler habits:
- Decide your design ahead of time. If you’re torn between two themes, pick the one you’ll be happier slicing and photographing.
- Bring your curiosity. The class is built for questions, not silent participation.
- Expect hands-on work. This is a cooking class, not a show.
- If you’re asking for a Tokyo kitchen, put that special request in early and clearly (areas near Asakusa or Skytree are referenced as options).
Book it or skip it: my honest recommendation
If you want a private sushi experience with real guidance, and you like the idea of making designer rolls that actually look like a designed pattern, I think you should book this. The one-to-one teaching makes the difference between “I tried” and “I learned something I can repeat.”
I’d only hesitate if Shinkashiwa is a major hassle for your schedule and you’re not confident you can secure the Tokyo kitchen request. For everyone else, it’s one of those experiences that feels short on paper but satisfying in practice: you leave with skills, food to take home, and a roll that looks way better than it should for a first try.
FAQ
How long does the sushi-making experience take?
It runs for about 2 hours (approx.).
Is this a private experience?
Yes. It’s listed as private, and only your group participates.
What’s included in the class?
Ingredients are provided by your instructor. You’ll also get takeout containers to take your sushi home.
Can I choose the design for my sushi rolls?
Yes. You can choose imaginative designs like minions, flowers, Mount Fuji scenes, dogs, or cats.
Do you teach beginners, or is it only for experienced cooks?
It includes instruction from a tutor step by step, and the experience is designed for making rolls even if you have no prior sushi rolling experience.
What happens during the class step by step?
You’ll mix ingredients to make colored rice, cut seaweed, assemble the colored rice and decorations, roll the sushi, then cut it into four pieces to reveal the pattern.
Where does the experience start and end?
It starts at Shinkashiwa Clinic in Shinkashiwa, Kashiwa (Chiba) and ends back at the meeting point.
Is there an option to do the class in Tokyo instead of Shinkashiwa?
There can be. The info suggests kitchens near Asakusa and Skytree if you add a special request where you want to enter the kitchen.
What’s the cancellation policy?
You can cancel for a full refund if you cancel at least 24 hours before the experience’s start time. Free cancellation is available up to 24 hours in advance.