REVIEW · TOKYO
Calligraphy & print your calligraphy on a T-shirt.
Book on GetYourGuide →Operated by Local Earth · Bookable on GetYourGuide
Japanese calligraphy has a way of making you slow down fast. In this workshop, you’ll learn the story behind Japanese writing, then put it to work by creating your own shodo—and stamping it onto a T-shirt you can wear home. Two things I love: you get real, hands-on guidance from Mana-san, and you leave with finished keepsakes (postcard plus shirt) instead of just a memory.
The main thing to consider is mess control. You’ll be working with brush, ink, and thin paper, so wear clothes you don’t mind getting ink on, and plan to take your time with each step.
If you’re the type who wants Japan to feel personal—not just photographed—this is a great fit. It’s also one of those rare activities where you practice, then immediately see your work become a wearable souvenir.
In This Review
- Key highlights you’ll care about
- Japanese Shodo Meets Your Wardrobe: What You’re Actually Doing
- From Fude Pens to Sumi Ink Sticks: The Core Skills You Learn
- The Class Flow: Ink, Practice Paper, Postcard, and Shirt Printing
- Choosing a Design and Deciding Where It Prints
- Price and Value: Is $48 Worth It?
- Who Should Book This Calligraphy T-Shirt Workshop
- Getting There in Honshu: Meeting Point and Timing Tips
- Should You Book It?
- FAQ
- Where is the meeting point?
- How long does the calligraphy and T-shirt class take?
- Is the instructor able to teach in English?
- What should I wear?
- Will I make my own ink during the workshop?
- Do I get to write anything besides the T-shirt?
- What items are included?
- When will my custom design be ready to take home?
- Can I print my design on a shirt I brought from home?
- Is there free cancellation and a pay-later option?
Key highlights you’ll care about
- Expert instruction in English with patient coaching as you practice strokes
- Make ink from scratch using water and a sumi ink stick, then use a Japanese brush pen
- 30 minutes on thin paper where you learn control before you commit to your design
- Green tea + a take-home postcard you write during class time
- Your design printed on your shirt after the writing phase, ready to go home
Japanese Shodo Meets Your Wardrobe: What You’re Actually Doing
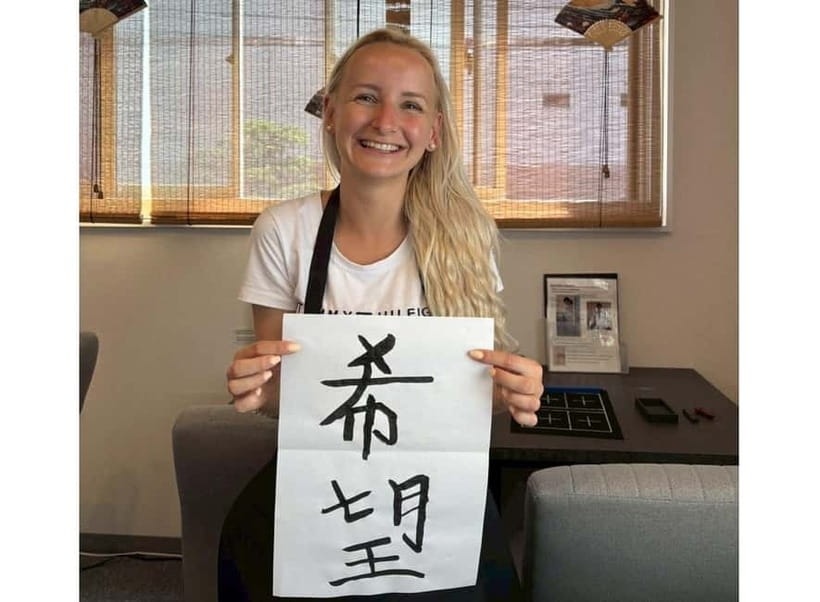
This isn’t a show. It’s a working session where you learn how Japanese characters are formed, then translate that practice into something you can wear.
You start with context: how Japanese writing developed, and how culture shaped what characters look like and how they’re used. It’s not academic hand-waving. The point of the history is to make the strokes feel purposeful, not random. That matters because calligraphy is all about control: direction, pressure, and rhythm.
Then you move into the fun part: writing. You’ll practice using a Japanese brush pen (a fude) and traditional ink, so you can feel how the brush spreads and thins. The first attempts can look wobbly, and that’s normal. The coaching style here focuses on getting you unstuck quickly—so you spend time learning, not struggling.
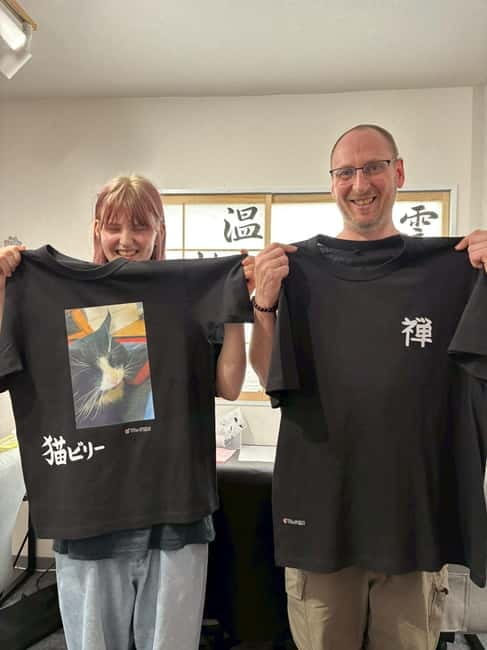
At the end, your custom piece gets transferred to a T-shirt. That shift—from paper practice to wearable art—is the reason this workshop works so well. It gives your learning an endpoint you can actually show off.
And yes, you’ll also enjoy green tea while you write a postcard you take home. It’s a small detail, but it turns the class into a calmer, more reflective hour than you might expect.
You can also read our reviews of more tours and experiences in Tokyo.



From Fude Pens to Sumi Ink Sticks: The Core Skills You Learn
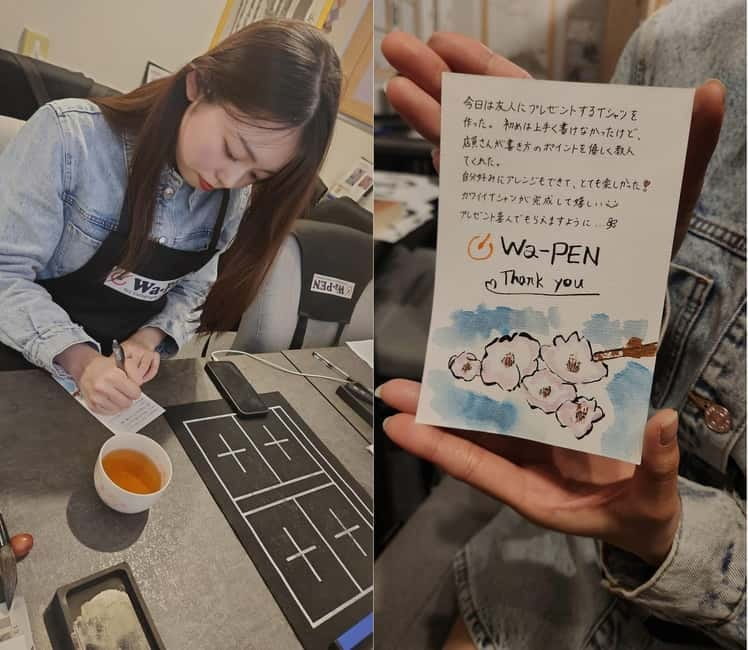
The workshop teaches the fundamentals you’ll need to understand Japanese calligraphy at a practical level.
First up is brush technique. The brush pen you use (the fude) behaves differently than a regular pen. When you press, you get a thicker line. When you lighten up, the ink thins. That’s why you don’t just copy shapes—you learn how to form a stroke the way you’re meant to.
Second, you learn traditional ink setup. You’ll make ink by mixing water with a sumi ink stick. This matters more than you might think. It forces you to treat ink as something alive, not just a liquid. You also learn how ink consistency affects how the line looks, which makes your later writing more predictable.
You also practice on thin paper. Thin paper changes everything. It encourages precision and control, because the ink behaves differently than it does on thicker stock. Plus, the session uses this practice time to get you comfortable with the feel of brush-on-paper before you choose your final design.
Then comes the character work. You may begin by working from models or stencil-like guides, which is a smart way to build confidence fast. Once you understand where the stroke should start and how it should end, you’re better positioned to personalize the result without everything falling apart.
Finally, you learn how to use what you’ve written as your own design. The workshop guides you to pick your favorite option and decide where it will go on your clothing. That’s a simple step, but it’s how you turn practice into a souvenir that looks intentional instead of accidental.
The Class Flow: Ink, Practice Paper, Postcard, and Shirt Printing
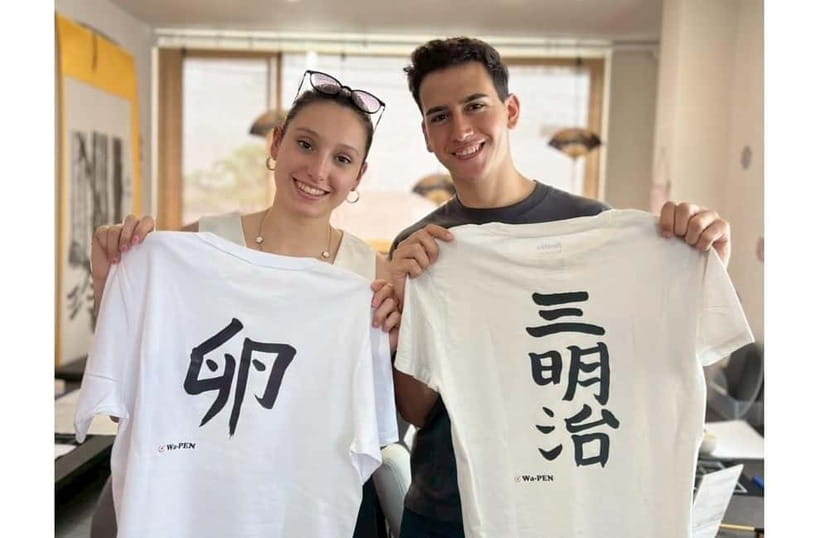
This is a timed workshop with a clear rhythm, and it helps you stay relaxed.
You’re asked to arrive about 10 minutes early so you can get ready. That early arrival time matters because once you start, you’ll want to focus on your strokes—not on sorting materials or asking where to go.
The first stage is history and instruction. You’ll learn about Japanese characters and culture from an expert instructor, then transition into technique. This is where the class sets expectations. You learn what to aim for: clean stroke beginnings, consistent pressure, and controlled endings.
Next you get hands-on practice. For about 30 minutes, you write on thin paper using the brush and ink system you set up earlier. This block is where most of your learning happens. You’re not just copying; you’re adjusting. The instructor’s job is to help you correct what’s off—like where you’re wobbling, or where the stroke is coming out too heavy or too light.
After you practice, you choose your favorite design. You then decide where it should go on your shirt. Placement is a quiet skill in itself. Center-chest designs read differently than prints lower on the shirt, and small changes in location can make the whole piece feel more balanced.
While your shirt is being handled for the printing step, you slow down again with your postcard. You’ll get green tea and a postcard template, and you write your own message. Even if your Japanese writing isn’t perfect yet, the postcard becomes a keepsake that shows your progress and your effort.
Your custom design is ready to take home after the printing phase, which takes about 10 minutes once the class reaches that step. So you’re not waiting around for hours. You’ll finish the experience with completed items rather than “send it later” disappointment.
Choosing a Design and Deciding Where It Prints
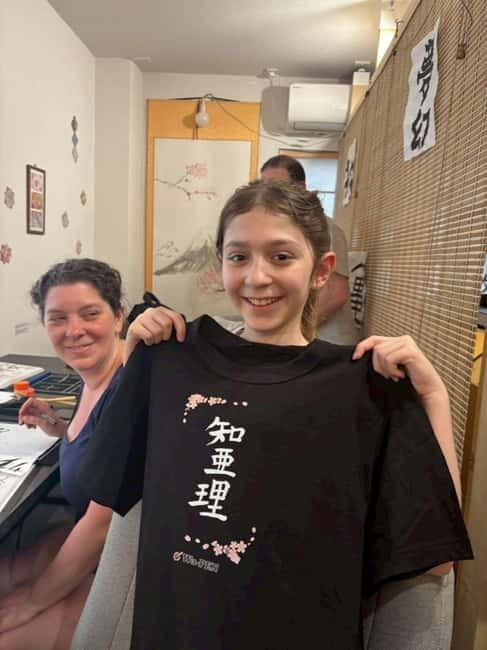
The design choice is part of the experience, not a throwaway. Since you’re learning strokes and character behavior, selecting what you want to wear helps you practice with a purpose.
Here’s the practical mindset I’d use: pick something that you can repeat successfully. If a model feels too complex for your current control level, your final shirt may look messy even if you like the idea. A simpler design can look cleaner and feel more personal once you’ve practiced it.
Placement is similar. The instructor will guide you in deciding where your design should go on your clothing. I’d treat placement like composing a photo: center, size, and balance matter. A design placed too high or too low can feel awkward, especially on a human body that moves and folds fabric differently than flat paper.
Also, think about what you’ll actually wear. A T-shirt is casual by nature, so your calligraphy print should fit that vibe. You’re creating something light enough to live in your everyday rotation, not a museum display.
If you’re bringing your own shirt, the workshop can offer that as an option (and that flexibility is a big win). You can print onto a lightweight shirt you already like, which makes the souvenir feel more like your wardrobe, not a purchase you made that you might not restyle.
Price and Value: Is $48 Worth It?
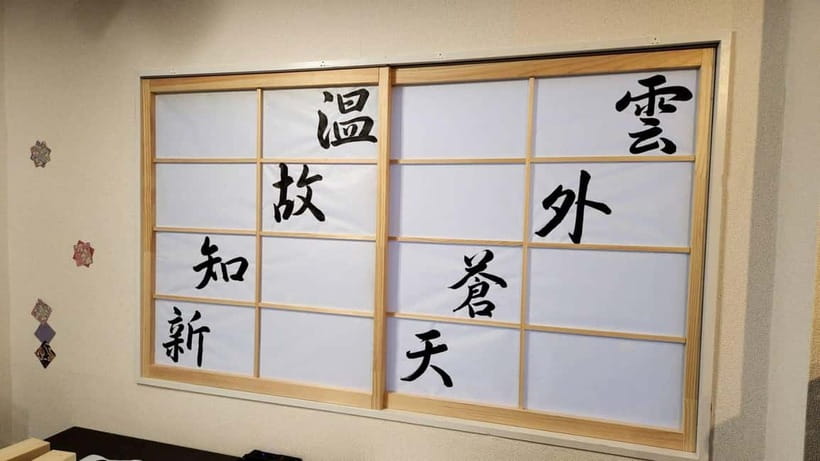
$48 sounds like a lot until you break down what’s included.
First, you’re paying for expert coaching. Calligraphy isn’t hard because it’s impossible—it’s hard because it requires fine control. You’ll get instruction to help you improve quickly.
Second, the materials are covered. You get the tools and supplies needed for the practice and ink making: pen, paper, ink, inkstone, paper-stopper, under pad, and the rest of what you need to do this properly. That means you’re not shopping for brush pens and ink sticks after, then realizing you bought the wrong kind.
Third, you’re leaving with multiple finished items: a postcard, plus the T-shirt with your custom calligraphy printed on it. That’s the key value driver. Many workshops end with a certificate or a take-home sheet of paper. Here, you walk out with something you can actually use immediately—especially the shirt.
Finally, the session includes green tea. It’s not the main reason to go, but it fits the tone of the class. It makes the hour feel calmer and more like craft time than a rushed tourist activity.
Overall, for a one-hour-to-90-minute cultural workshop with real instruction and tangible keepsakes, this is solid value.






Who Should Book This Calligraphy T-Shirt Workshop
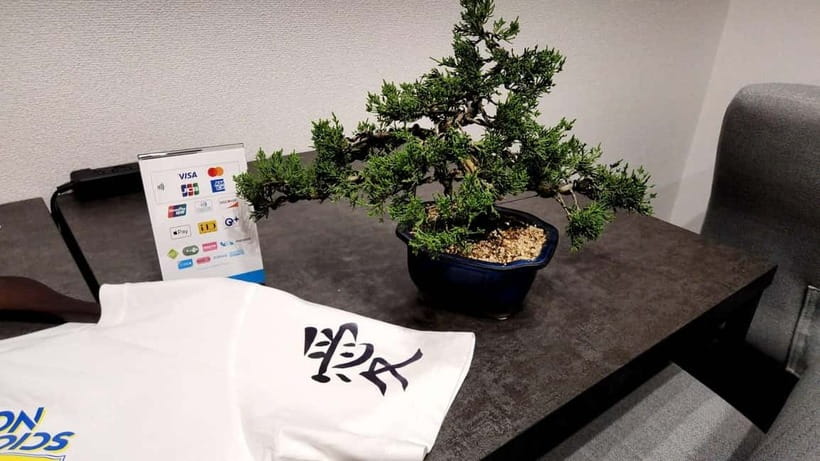
This activity fits best if you want a hands-on cultural experience with an easy-to-understand payoff.
You’ll likely love it if:
- You enjoy crafts where practice leads to a visible result
- You want a unique souvenir that isn’t mass-produced
- You’d rather learn something you can try again later (even casually) than just watch a demonstration
- You travel with kids or teens who like structured activities; the class can be especially engaging for younger participants
It’s also a great pick if you’re traveling with other people who learn at different speeds. The instructor can tailor guidance so both beginners and more confident writers feel supported. In at least some sessions, you might even find the group is small enough that attention feels very personal.
One more reason to book: you’re working with a teacher named Mana, and the instruction style is patient and accommodating. That matters in calligraphy, where the easiest mistake is getting discouraged after the first couple strokes.
A possible drawback is that this is learning-time. If you’re expecting a quick, “watch and get your shirt” kind of souvenir, you may want a different format. But if you’re open to putting brush to paper, you’ll get a lot out of the process.
Getting There in Honshu: Meeting Point and Timing Tips
The meeting point is in a red brick building, on the 3rd floor. There’s a sign on the 1st floor, and the restaurant is also on the 1st floor. Go up the stairs to the right of the restaurant.
Bring comfortable clothes. You don’t need to dress up, but you should dress like you’re okay with accidental ink spots. Calligraphy is messy in that satisfying, controlled-craft way.
Timing tip: because your shirt printing happens relatively quickly once you reach that stage, you can use the window before and after class to explore nearby. If you’re already planning time in the Asakusa area, it can be a nice fit—your class gives you something calm to do, then you can continue sightseeing while your trip stays balanced.
Should You Book It?
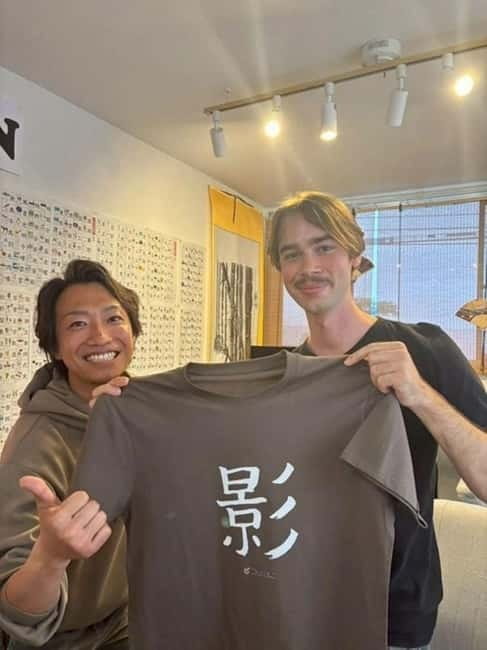
Book it if you want a real skill lesson, a calm craft experience, and souvenirs that feel handmade.
This workshop works because it hits all three: instruction, practice, and a final outcome you take home. The custom T-shirt is the big headline, but the postcard and the ink-making process are what make it feel authentic. You’re not just collecting a product. You’re learning how to make characters with intention.
Skip it only if you’re short on time or you really don’t want to handle ink and thin paper. Otherwise, this is a great way to get a Japanese cultural experience that you’ll remember every time you wear the shirt.
FAQ
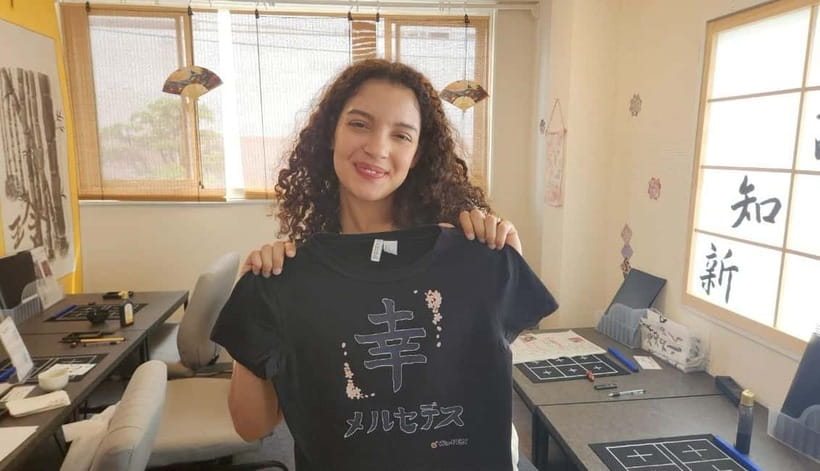
Where is the meeting point?
It’s in a red brick building on the 3rd floor. There is a sign on the 1st floor, and the restaurant is on the 1st floor. Go up the stairs to the right of the restaurant.
How long does the calligraphy and T-shirt class take?
The duration is 1 hour to 90 minutes, depending on the starting time.
Is the instructor able to teach in English?
Yes. The instructor teaches in English.
What should I wear?
Wear comfortable clothes that you don’t mind getting ink on.
Will I make my own ink during the workshop?
Yes. You’ll make ink with water and a sumi ink stick and learn how to use the Japanese brush pen (fude).
Do I get to write anything besides the T-shirt?
Yes. You practice writing on thin paper and you also write a postcard to take home.
What items are included?
You get all necessary writing materials, including pen, paper, ink, inkstone, paper-stopper, under pad, plus green tea, a postcard, and a T-shirt.
When will my custom design be ready to take home?
After the printing step, your custom design will be ready to take home as part of the class, and the printing takes about 10 minutes.
Can I print my design on a shirt I brought from home?
The experience can include printing on a shirt you bring, if you choose that option.
Is there free cancellation and a pay-later option?
Free cancellation is available up to 24 hours in advance for a full refund. You can also reserve now and pay later.